6.4 图像与图层合并
章节大纲
-
In this lesson, you'll use two images, "27_TimesSquare.jpg" and "28_Gustavo.jpg." Before continuing, click on the Resources tab and download these images.
::在此课中, 您将使用两个图像, “ 27_Timesquare. jpg ” 和 “ 28_ Gustavo. jpg ” 。 在继续之前, 请点击资源标签并下载这些图像 。
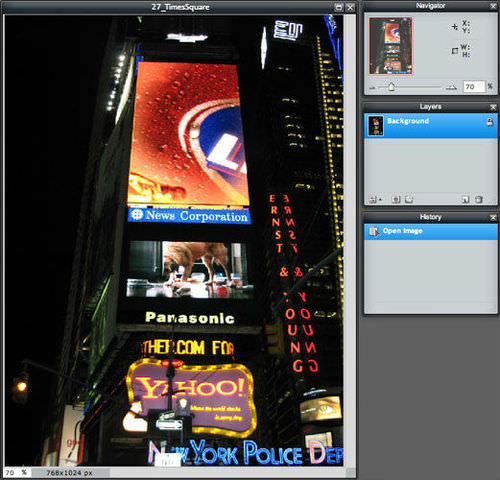
Layers can be used to combine images. In this activity, you’ll start with an image of Times Square lights at night and put a different image into the big LCD screen.
::图层可以用来组合图像。 在此活动中, 您将开始在晚上使用时代广场灯的图像, 并在大型 LCD 屏幕上安装不同的图像 。Open the image “27_TimesSquare.jpg” in Pixlr Editor.
::在像素编辑器中打开图像“ 27_Timesquare.jpg ” 。
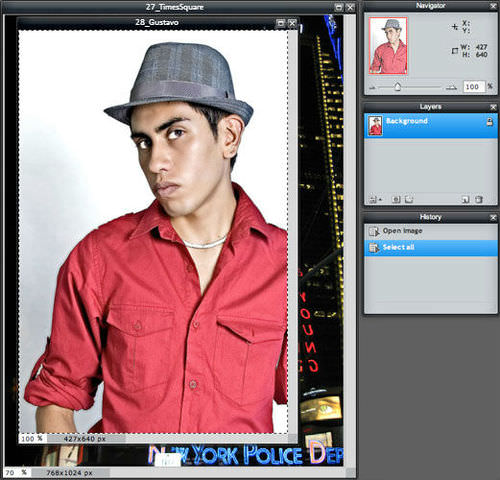
Next, open the image “28_Gustavo.jpg” in Pixlr Editor. The second image appears on top of the first image.
::下一步, 在 Pixlr 编辑器中打开图像“ 28_ Gustavo. jpg ” 。 第二张图像出现在第一个图像的顶端 。-
Make sure "28_Gustavo" is the active Image panel.
::确保“ 28_ Gustavo” 是活动图像面板 。 -
Click the
Edit
menu and choose
Select All
to select the entire Gustavo image.
::单击编辑菜单并选择全部选择以选择整个 Gustavo 图像。 -
Click on the
Edit
menu and select
Copy
.
::单击编辑菜单并选择复制件。 -
Close the Gustavo image without saving.
::关闭古斯塔沃的图像 而不保存。
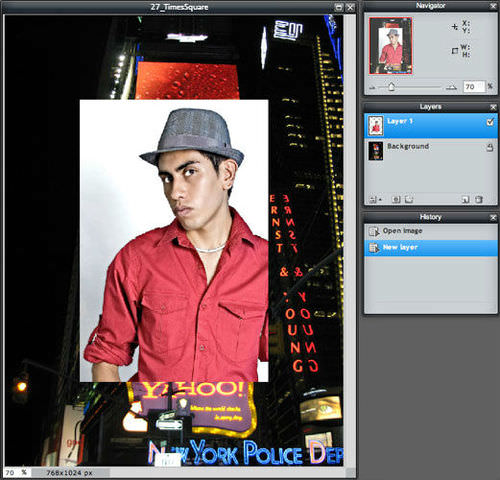
In the Times Square image, click on the Edit menu and choose Paste . The Gustavo image is added as the front layer.
::在时代广场图像中, 点击编辑菜单并选择粘贴。 Gustavo 图像被添加为前层 。-
Make sure the Gustavo layer is active.
::确保古斯塔沃层活动正常 -
Click on the
Edit
menu and select
Free Distort
.
::单击编辑菜单并选择自由扭曲。 -
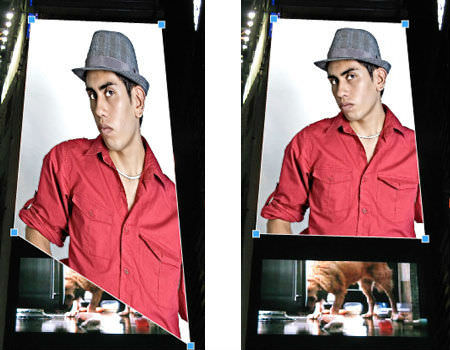
You’ll see a blue handle (square) at each corner of the image in the Gustavo layer.
::照片在古斯塔沃层的每个角落都会看到蓝色手柄(平方), -
Click and drag each of the four handles until the image of Gustavo perfectly covers the LCD screen of the
Background
layer.
::单击并拖动四个控点的每个控点,直到古斯塔沃的图像完全覆盖背景层的液晶屏幕。
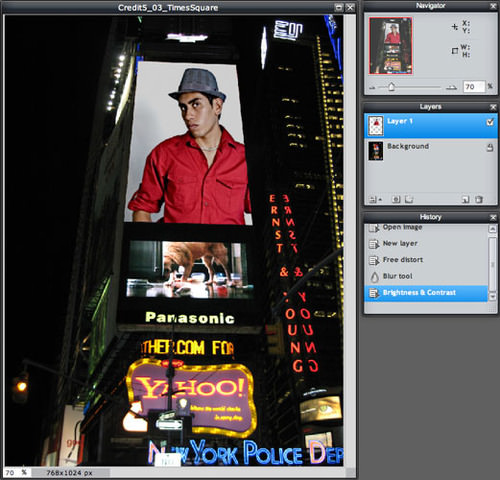
The image of Gustavo is too bright and sharp in relation to the Times Square image, so it doesn't look like it could have been in the original image.
::古斯塔沃的形象与时代广场的图像相比太明亮和尖锐, 所以它看起来不像原本的图像。-
Click on the
Adjustment
menu, and select
Brightness & Contrast
.
::单击调整菜单,并选择亮度和对比度。 -
Drag the
Brightness
slider to the left to darken the Gustavo layer to look like it belongs in the Times Square image.
::将亮度滑块拖到左边, 使 Gustavo 层暗化, 使之看起来像属于时代广场的图像 。 -
Select the
Blur
tool from the
Tools
panel.
::从“工具”面板中选择模糊工具。 -
Set the brush size to 200 and rub the Gustavo layer to blur it a little to match the Times Square image.
::将刷子的大小设为200, 并擦擦古斯塔沃层, 使其模糊一点, 以匹配时代广场的图像 。
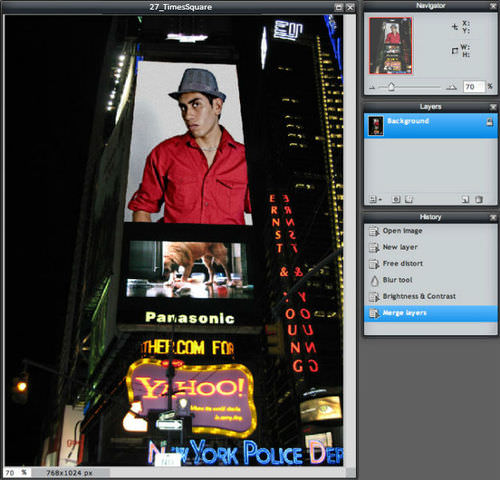
The final step is to combine the layers into one layer.
::最后一步是将各层合并为一层。Click on the Layers menu and select Flatten image . Flattening an image combines all layers into one Background layer. Other layer merging options are Merge down (combines the active layer with all layers beneath it) and Merge visible (combines only layers that are visible and skips layers with the visible box unchecked).
::单击图层菜单并选择平面图像。 将图像的层叠加成一个背景层。 其它的层叠加选项是合并下来( 将活动层与下面的所有层相连接) 和合并起来( 仅显示可见的共线层, 并用可见的框未加显示的框跳过层) 。
Save the finished image in JPEG format, share it with your teacher, and be prepared to discuss what you’ve learned.
::以 JPEG 格式保存完成的图像, 与您的老师分享, 并准备讨论您学到的东西 。
RECORD YOUR FINDINGS
::记录你的调查结果-
How did you use layers to combine two images into one?
::您如何使用层将两个图像合并为一个 ? -
What did
Free Distort
allow you to do?
::自由扭曲允许你做什么? -
Why did you need to blur and darken the Gustavo layer?
::你为什么需要模糊和黑暗 古斯塔沃层? -
What does
Flatten image
do?
::平面图像是做什么的?
-
Make sure "28_Gustavo" is the active Image panel.