Blender 3D:零基础到专业级-单元3:拓展视野

Water and Other Fluids
::水和其他液体
Water is without a doubt one of the most important compounds in our lives; It covers about 75% of the earth and is therefore incredibly important in quite a few Blender animations. Wouldn't it be great if we could get an accurate physical representation of this liquid in Blender? We can, using a tool called Fluid Simulation. This tool looks unnervingly complex at first glance, but this tutorial should clear it up for you. At least to a basic level.
::毫无疑问,水是我们生活中最重要的化合物之一;它覆盖了地球的75%左右,因此在不少的混合动力动画中非常重要.如果我们能在混合动力动画中准确地物理地表示这种液体,这将是很棒的.我们可以,使用一种叫做流体模拟的工具.这款工具在一眼看来很复杂,但这门教程应该为您澄清.至少在基本层面上.
The Domain
::域名
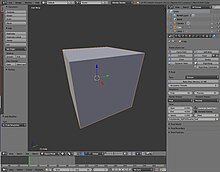
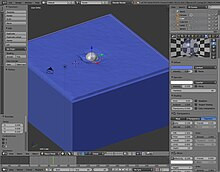
One can imagine how much time it would take Blender3D to think about everything in the infinite space of a 3D world in terms of fluid objects and deflection, so we obviously need to cut down on that size. Create a fairly large cube. This will eventually be set as the volume in which all of the fluid simulation occurs. Don't make it too large, but not too small either, let's say 10 times bigger. With this cube selected, go to to the Physics context
![]() of the Properties window. Find the button that says "Fluid", and click the "Fluid" button to enable the function. Set type to "Domain". All the fluid physics will be calculated inside this cube. Also in that tab, you'll see 3 sub-sections, "Fluid World", "Fluid Boundary" and "Fluid Particles". Each one opens a different set of settings. These will be explained as they become important.
of the Properties window. Find the button that says "Fluid", and click the "Fluid" button to enable the function. Set type to "Domain". All the fluid physics will be calculated inside this cube. Also in that tab, you'll see 3 sub-sections, "Fluid World", "Fluid Boundary" and "Fluid Particles". Each one opens a different set of settings. These will be explained as they become important.
::想象一下Blender3D需要多少时间来思考3D世界的无限空间中的一切,从流体物体和偏移的角度来看,所以我们显然需要减少这个大小.创建一个相当大的立方体.这最终将被设置为所有流体模拟发生的体积.不要让它太大,但也不要太小,比如说大10倍.当选择了这个立方体时,进入属性窗口的物理上下文.找到按"流体",然后点击"流体"按来启用该函数.设置键入"域".所有的流体物理将在这个立方体内计算.在该表中,你会看到3个子部分",流体世界","流体边界"和"流体粒子".每个部分都会打开不同的重要设置,它们将被
Under "Time" you can adjust how many seconds the fluid animation will take. Due to this you should change the "End" frame to "96", under the "Timeline", because the standard setting is "4". You can also change it how you like.
::在"时间"下,您可以调整流体动画需要多少秒.因此,您应该将"结束"更改为"96",在"时间表"下,因为标准设置为"4" .您也可以随意更改.
To make the other objects go into the "Wireframe" viewport.
::让其他物体进入"线框"视窗.
The Fluid
::流体
As a basic start up for your experiments with fluid simulation, I am going to take you through a small demo in which we drop an object into a pool of water, creating a splash. To do this, we need a fluid object and an obstacle object. For the fluid, create another cube, scaled down to cover the bottom of your domain. Make a rectangle, that hovers just inside the domain and is half as high as the domain. Enable this object in fluid simulation also and set type to "fluid". When we start to bake the fluids, this will be set up as your liquid.
::作为您对流体模拟实验的基本开始,我将带您经过一个小演示,我们将一个物体放入水池中,产生喷. 要做到这一点,我们需要一个流体物体和一个障碍物体. 对于流体,创建另一个立方体,缩小以覆盖您的域底部. 创建一个矩形,它在域内,并且是域的一半高. 在流体模拟中也启用此物体,并将类型设置为"流体". 当我们开始制流体时,它将被设置为您的液体.
Let us go over what you have now. You have your starting cube, with fluid physics and type "domain", and will be referred to as "Domain". Inside this is the rectangle that will cover the bottom of your Domain , which is the liquid. The liquid will be a different object with the type "Fluid".
::让我们回顾一下你现在的情况. 你有你的起始立方体,用流体物理和类型"域",它将被称为"域". 在这个内部是将覆盖你域底部的矩形,即液体. 液体将是一个不同的物体,类型是"流体".
The Obstacle
::障碍
Create a third object which we will call "Obstacle". This will be the object dropped into the water, and will be described further in the explanation. Give it an IPO/Animation to drop into the water, and enable it as --you guessed it-- an obstacle (click the "fluid" button, in physics, and set type to "obstacle").
::创建第三个物体,我们将称之为"障碍物".这将是物体落入水中,并将在解释中进一步描述.给它一个IPO/动画落入水中,并使其作为 - - 你猜到了 - - 一个障碍物 (点击"流体"按,在物理中,并设置类型为"障碍物").
Set up the animation in the front/side views, not the top view. The z-axis is where gravity works.
::设置动画在前/侧视图,而不是顶部视图. z轴是重力作用的地方.
Baking Fluids
::制液体
Now we get to see what it all looks like. Select the domain object, and find the big button that says "BAKE" under "Physics" - "Fluid". If you want to use a bake again, don't choose a temporary location, otherwise you'll have to bake it all over again. Press it. Be patient, blender has to bake this simulation, something like it would render the final product. The loading bar of this baking will stay in the bar at the top of the screen with the blender logo. If at any time you feel that you want to abort this process, press "Esc". Once the bake is finished, click under the "Timeline" on the play button. You should be able to view the full simulation.
::现在我们可以看到它是什么样子. 选择域对象,并找到大按说"烤"在"物理" - "流体". 如果你想再次使用烤,不要选择临时位置,否则你将不得不烤它从头开始. 按它. 耐心,混合器必须烤这个模拟,就像它将最终产品. 这种烤的加载条将留在屏幕顶部的条,与混合器标志. 如果在任何时候你觉得你想中止这个过程,按"Esc". 一旦烤完成,点击"时间表"在播放按. 你应该能够查看完整的模拟.
Finishing touch
::最后一个
Blender will make your water its default opaque grey, unless you set its color. A good way to make realistic, clear water (as well as glass for that matter) is to edit the color, then apply a simple mirror effect plus transparency effect. After your water has rendered, select the domain in object mode. This selects the liquid in the frame you have just added. in the "Materials" tab (if when you click on this, the colors settings are not up, just press add new under the only panel there). Go to the "Mirror" section, play around with the settings until you get what you fancy. Suitable settings include Reflectivity to 0.1 for water, 0.15 for glass, set depth to 7; Under the Transparency section, click on Raytrace and set IOR to 1.3 for water, 1.5 for glass; Then set the Alpha value to 0.1 while adding an appropriate color under the "Diffuse" section, like: "6279E7". I should do the same for the "Fluid"
::混合器将使您的水默认的不透明灰色,除非您设置其颜色.一个很好的方法来使现实,清晰的水 (以及玻璃) 是编辑颜色,然后应用一个简单的镜像效果加透明效果.在你的水染后,选择域在对象模式.这选择了你刚刚添加的框架中的液体.在"材料"选项卡 (如果您点击此时,颜色设置没有,只需按新添加在唯一的面板下).进入"镜像"部分,玩弄设置,直到你得到你想象的.合适的设置包括反射率为0.1水,0.15玻璃,设置为7;在透明度部分,点击光线跟踪并设置IOR为1.3,为水,为1.5;然后在"分散"
Other Fluid Objects
::其他流动物体
There are other incredibly useful types of fluid objects like "inflow" and "outflow". The both of these do exactly what they sound like. Inflow objects pour more fluid into the scene, and outflow objects drain it away.
::流体对象还有其他非常有用的类型,如"入流"和"出流".这两种对象的声音完全一样. 流体对象将更多的流体注入场景中,而流体对象则将其排放出去.