Blender 3D:零基础到专业级-单元3:拓展视野
Introduction
::引言 时间
Particle systems are used to simulate large amounts of small moving objects, creating phenomena of higher order like fire, dust, clouds, smoke, or fur, grass and other strand based objects. You may also use other objects as a visualization of particles.
::粒子系统用于模拟大量的小移动物体,创造更高层次的现象,如火,尘埃,云,烟雾或皮毛,草和其他基于链的物体.您也可以使用其他物体作为粒子的可视化.
Before you start with the tutorials, you should at least take a brief overview about the very extensive
documentation pages
of the particle system. You will find every single parameter explained in the manual if you have the desire to delve deeper ...
::在开始学习之前,你至少应该对粒子系统的详细文档进行简要概述.如果你有更深入的愿望,你会在手册中找到解释每一个参数的内容.
Don't forget: particles alone don't do any magic. They are only a placeholder for something nice to view. You have to take care of the visualization also, and that is usually the harder part than to create the particle system.
::别忘了:粒子本身没有什么神奇的作用.它们只是一个可观的东西的保留符.你必须照顾可视化,这通常比创建粒子系统更困难.
The very first particle system
::它们是最早的粒子系统.
Creating a particle system
::创建一个粒子系统
To create a particle system:
::为了创建一个粒子系统:
-
Create a mesh object to be the “parent” (source) of the particles (only mesh objects can emit particles). Let’s use a simple plane to start with.
::创建一个网格对象,作为粒子的"父" (源) (只有网格对象才能发射粒子).让我们使用一个简单的平面来开始. -
select the object
::选择一个对象 -
change to the Particles
 tab in the Object Properties window
::在对象属性窗口中更改为粒子选项卡 -
click on the “+” button (
Image. 1a
)
::点击"+"按 (图1a)
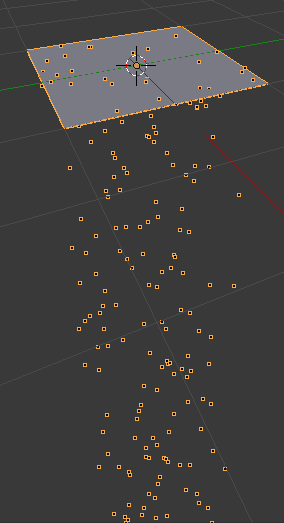
Voila, your first particle system (
Image. 1b
)! It doesn't do anything useful now, but we're going to change that on the following pages.
::现在它没有什么有用的功能,但我们将在下面的页面中改变它.
-
To see the particles, you must start the animation running by pressing Alt + A . You will see particles appear and fall from the plane. Press Esc to stop the animation; you return to frame 1. The particle movement is cached (stored), so if you play your animation again it will go faster (well, you won't notice any difference in this simple case).
::要看到粒子,你必须通过按下Alt+A开始动画运行.你会看到粒子出现并从平面上掉下来.按Esc来停止动画;你回到1.粒子运动被缓存 (存储),所以如果你再次播放动画,它将更快 (好吧,你不会注意到任何差异在这个简单的例子). -
If you want to stop the animation in the current frame, press Alt + A while it is running instead of Esc .
::如果您想在当前中停止动画,请按下Alt+A,而不是Esc. -
The shortcut for returning to the first frame is Shift + ← )
::回到第一的快捷方式是Shift + ←) -
To see the particles even better change to wireframe mode ( Z ),
::为了更好地看到粒子转换为线框模式 (Z),
If you change anything in your particle system you always have to return to frame 1, to recalculate the system from the start.
::必须从头重新计算系统. 现在,我们可以从头开始计算系统.
Use the
timeline
window along the bottom of the screen to change easily between frames.
::通过屏幕底部的时间表窗口,
|
|
Ultra Physics Coolness:
While the animation is running, you can move the objects in the 3D window and the particle system is updated in realtime. The system is not cached then.
|
Changing properties of the system
::系统的变化属性
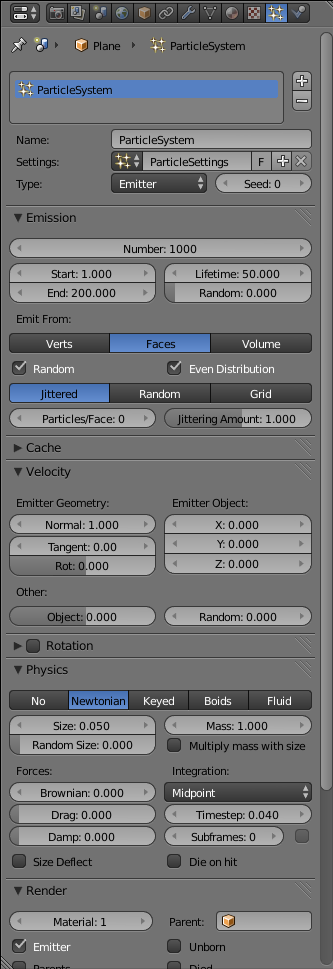
Some important settings, from the “Emission” panel:
::排放面板中的一些重要设置:
-
Number:
the total number of particles; increase this to 5000
::数量:颗粒的总数;将其增加到5000 -
Start:
and
End:
the start and end frame of the emission
::开始:和结束:发射的开始和结束 -
Lifetime:
the lifetime in frames of the particles
::寿命:粒子的中的寿命
And in the “Velocity” panel are settings that combine to determine the initial velocity of the particles:
::并且在"速度"面板中, 组合起来来确定粒子的初始速度:
-
Normal:
a velocity component in the direction of the face normal (if emitted from faces)
::正常:面正常方向的速度元件 (如果从面发出) -
Tangent:
a velocity component parallel to the face
::触角:与面平行的速度组成部分 -
Rotation:
controls the direction of the tangent velocity component
::旋转:控制触速元件的方向 -
Emitter Object X/Y/Z
: a velocity component oriented in the object’s coordinate system
::发射器物体X/Y/Z:在物体坐标系中定向的速度组件 -
Object:
a multiplier that imparts some proportion of the object velocity to the particles (try moving the object around with a nonzero value for this field to see its effect)
::物体:一个乘数,它赋予粒子物体速度的某种比例 (尝试将物体移动到非零值的这个场来看它的效果) -
Random:
a random contribution to the object velocity
::随机:对物体速度的随机贡献
Initially, the plane has its face normal oriented upwards. However, it probably looks like the particles are emitted downwards. This is because the initial normal velocity of 1.0 is quite small compared to the force of gravity (which is on by default). Try increasing it to something like 10.0, and when you rerun the animation, you should see the particles rise quite high above the plane before falling down again.
::飞机的表面通常是向上方向的.但是,看起来粒子是向下发射的.这是因为1.0的初始正常速度相对于引力 (默认是开启的) 相当小.试着将其增加到10.0这样的东西,当你重新运行动画时,你应该看到粒子在飞机上方很高之前再次下降.
If you render a frame with particles showing, you will see the particles appear as white blobs. This is the default
Halo
rendering of the particles.
::如果染一个带有粒子的,你会看到粒子是白色的斑点.这是粒子的默认Halo染.
Changing the material of the particles
::改变颗粒的材料
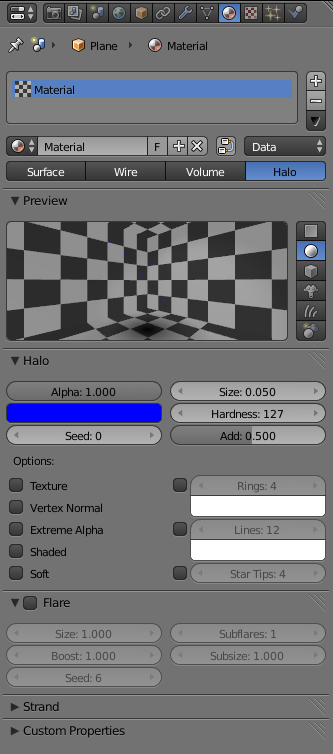
-
Switch the Properties window to the Materials
 tab and create a new material for the plane.
::切换属性窗口到材料选项卡, 并为平面创建一个新的材料. -
Change the material type to
Halo
. (see also the
Manual on Halos
). Halos are a post rendering effect, that is applied after the scene is finished. So halos can't shed any lights on other objects, they are not rendered behind
RayTransp
materials (like glass).
::改变材料类型为 Halo. (还见"Halos手册").Halos是后染效果,在场景完成后应用.因此,halo不能在其他物体上发光,它们不会在RayTransp材料 (如玻璃) 后染.
-
Set the color to deep blue (RGB: 0/0/1)
::将颜色设置为深蓝色 (RGB: 0/0/1) -
Size:
0.05 so each halo is quite small.
::它们的光环很小. -
Hardness:
127 so that each halo has the maximum sharp edge
::硬度:127使每一个光环具有最大的尖端 -
Add:
0.5 so that the brightness increases where several halos overlap
::添加:0.5使几个光环重叠时的亮度增加
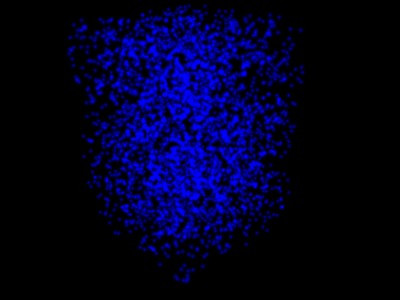
Set the world color to black and render (
Img. 3b
). Nothing special till now, but that will change soon. So proceed to the next page, where we're going to make some fire.
::设置世界颜色为黑色和染 (图3b). 现在没有什么特别的,但这将很快改变.所以继续到下一页,我们将会点燃一些火.