Blender 3D:各种各样的教程
After studying the subject, we are ready to tackle modeling it. Start up Blender.
::现在我们准备着模拟它.
Start with a Primitive
::开始一个原始
For this project we would use a cube. The cube already has several face loop we need and none of that we don't, so this primitive is a good starting point.
::对于这个项目,我们使用一个立方体. 立方体已经有我们需要的几个面环,而我们没有任何一个,所以这个原始是一个很好的起点.
Opening Blender, we are already supplied with the default cube which is handy. If you don't have the default cube because you change the setting or remove it, simply add a new cube. Name this primitive something sensible like "Swan Chair" because it would become our chair later. Move the cube or adjust the background image until the cube is centered at our image. After doing that we proceed shaping our cube to create the basic form of our chair.
::打开Blender,我们已经提供了默认的立方体,这很方便.如果您没有默认的立方体,因为您更改设置或删除它,只需添加一个新的立方体.把这个原始的东西命名为"天椅",因为它将成为我们的椅子.移动立方体或调整背景图像,直到立方体以我们的图像为中心.这样做后,我们继续塑造我们的立方体,以创建我们的椅子的基本形式.
Rough it out
::让它出来
Since we are modeling a symmetrical object, lets take advantage of it and use the mirror modifier. Cut the cube in the front exactly in half by using loop cut at center (Shift + RKey -> middle click, or Ctrl + RKey -> middle click on this editor's computer). For those with no middle buttons you could use subdivide. Select the vertical edges (go to edge select mode first, Ctrl + Tab -> 2) then use subdivide tool (WKey -> 1). Remove the left half by deleting the vertices. Then add a mirror modifier in the modifier stack. This is available at the edit buttons, select the modifiers tab the click the "Add Modifier" button and select "Mirror" from the selection. Activate "do clipping" from the mirror modifier panel that appeared to prevent accidental movement of the central vertices.
::由于我们正在建模一个对称的对象,让我们利用它并使用镜像修改器.在前面切割立方体正好一半,使用循环切割在中心 (Shift + RKey -> 中间点击,或Ctrl + RKey -> 中间点击在这个编辑器的计算机).对于那些没有中间按的人,你可以使用分区.选择垂直边缘 (首先进入边缘选择模式,Ctrl + Tab -> 2) 然后使用分区工具 (WKey -> 1).通过删除顶点删除左半部分.然后在修改器堆中添加镜像修改器.这可在编辑按上使用,选择修改器选项卡点击"添加修改器"按并从选择单选"镜像".从显示的面板中激活"涂抹
(Noob Note: If you follow these instructions, you'll have a gap between the mesh and its mirror. I fixed this by increasing the "Merge Limit" option in the Mirror modifier menu to .1.)
::通过增加镜像修改器菜单中的"合并限制"选项到0.1来解决这个问题.
|
| The cube primitive with mirror modifier on |
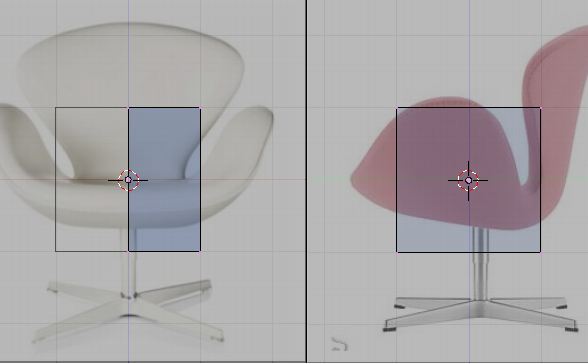
Move the vertices so that it would follow the shape of the bottom of the chair image.
::移动顶点,使它遵循椅子图像底部的形状.
|
| Shaping the bottom |
Note that the reference images used does not match very well. This is because of perspective and camera angle distortion. In this case use the side image sice it shows less distortion. Use the front reference image as an eyeballing guide for the front side of the chair. An oblique reference as stated earlier in planning stages is helpful to guide you in this condition.
::注意使用的参考图像不太匹配.这是因为视角和摄像头角度的扭曲.在这种情况下,使用侧面图像,因为它显示的扭曲较小.使用前侧参考图像作为椅子前侧的视球指南.在规划阶段前面提到的斜视图有助于指导您在这种情况下.
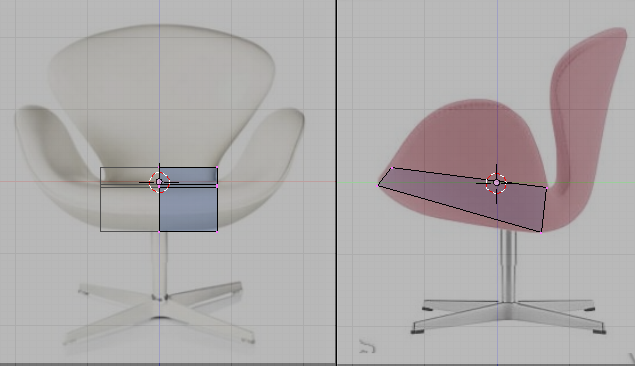
Add an edgeloop using the loop cut tool (Shift+RKey) as shown in the image bellow. Move the newly created vertices to follow the references
::添加一个边缘循环使用循环切割工具 (Shift+RKey) 如图所示. 移动新创建的顶点以遵循引用

|
| Shaping the bottom |
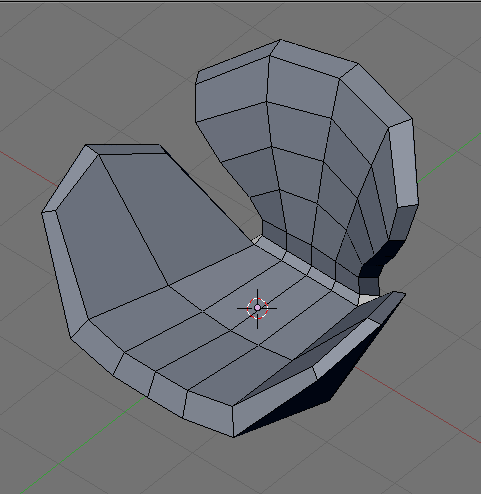
Its is good practice that while modeling you had to view your model at various views not only the standard front, side and top views. Remember that you are modeling a 3d object. What looks good in this some views are not necessarily good in other views. This would result in complications like the familiar flat face look in face models. Moving your view around would help you prevent this. Shown bellow is the view of the model at an oblique view.
::模型制作时,你必须在不同的视图上查看模型,而不仅仅是标准的前,侧和顶视图.请记住,你在建模一个3D对象.在这个视图中看起来很好的一些视图在其他视图中并不一定是好的.这会导致像面部模型中熟悉的平面面貌这样的并发症.移动视图可以帮助你防止这种情况.下面显示的是模型在斜视图上的视图.
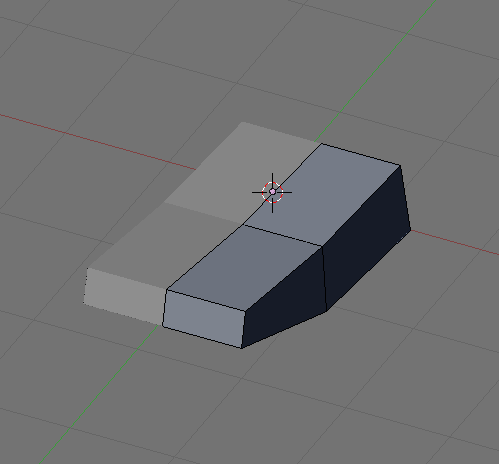
|
| Shaping the bottom oblique view |
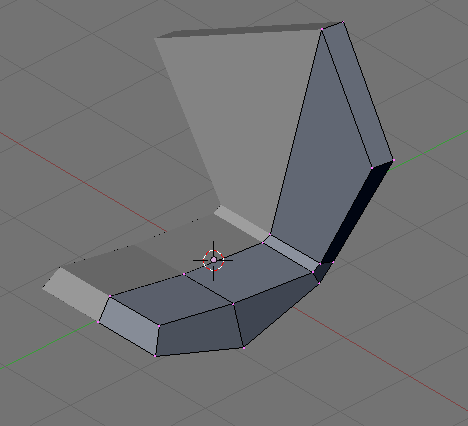
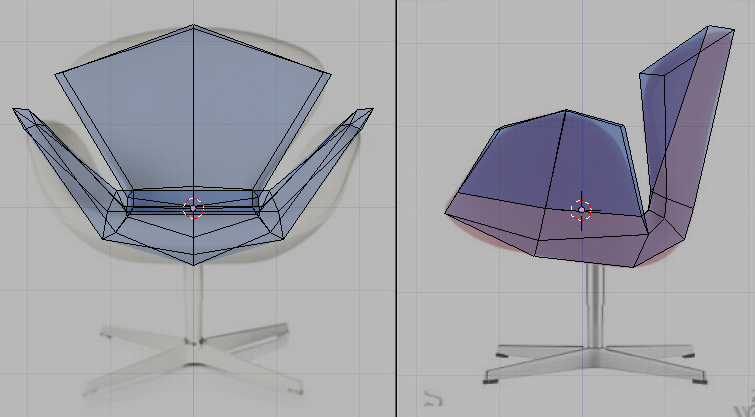
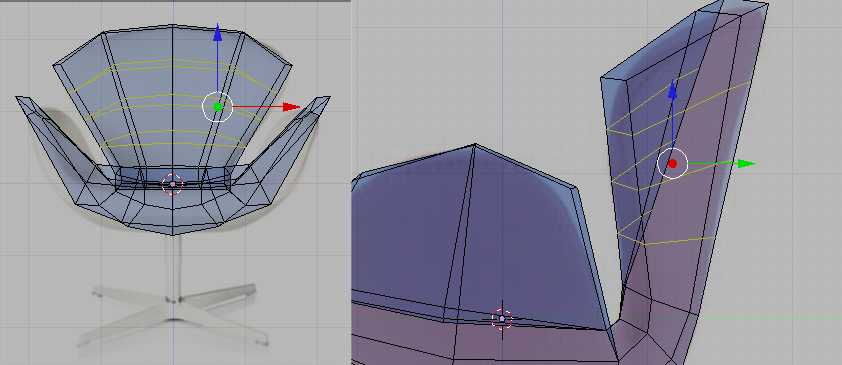
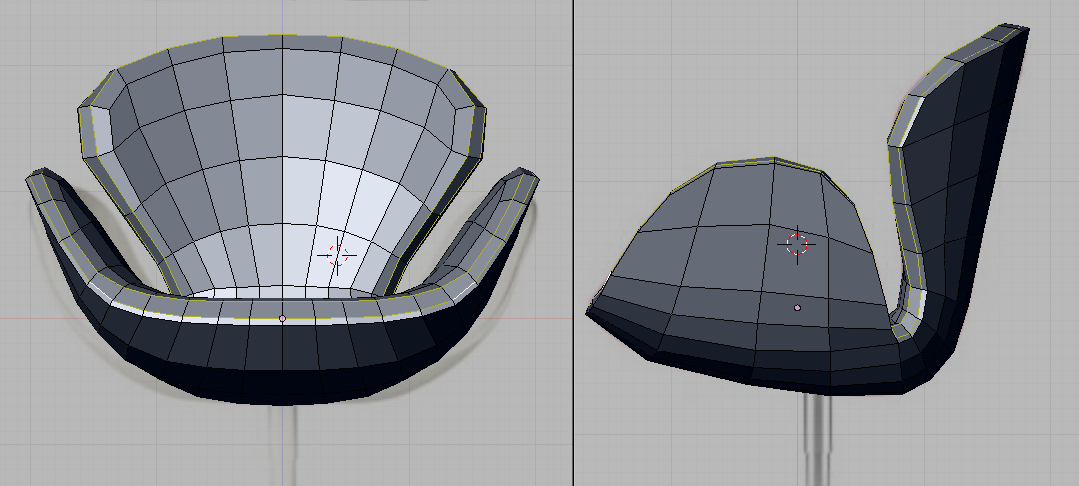
Now extrude the back part of the model to form the back part of the chair. Adjust the newly formed vertices to follow your guide images as shown bellow.
::现在将模型的后部挤出,形成椅子的后部. 调整新形成的顶部,以遵循您的指导图像,如下所示.
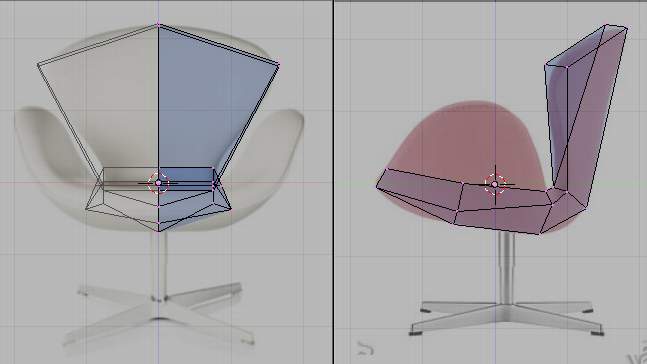
|
| Shaping the back |
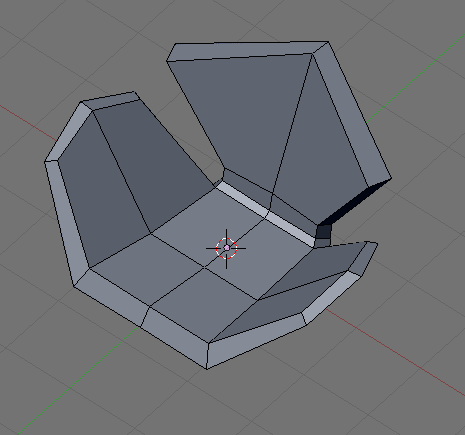
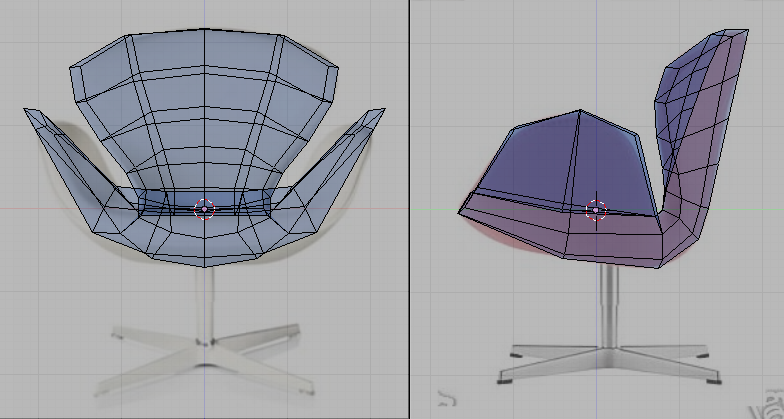
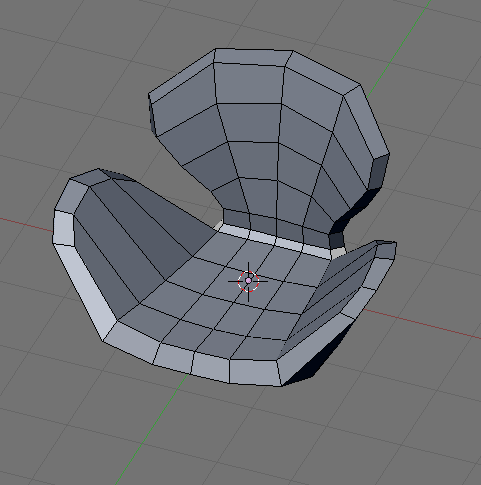
Its a good practice to see the model at various views while modeling here is how it look like now at an oblique view:
::模型在不同角度看起来很好, 模拟时, 现在的斜视图是这样的:
|
| Shaping the back oblique view |
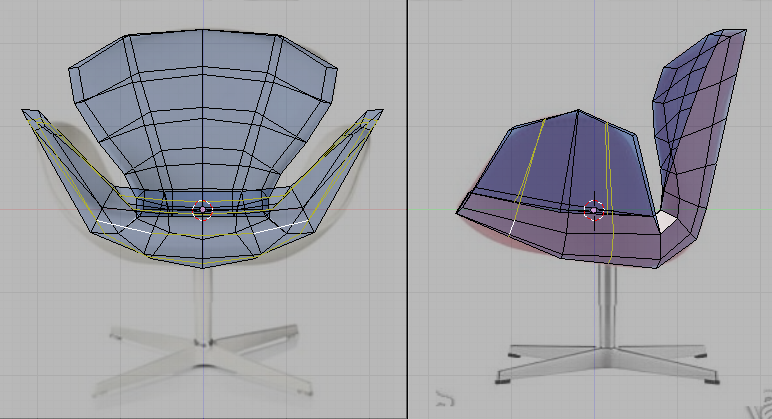
Select the following faces. We are going to extrude it to form the sides for the chair.
::选择下列面. 我们将挤出它形成椅子的边.
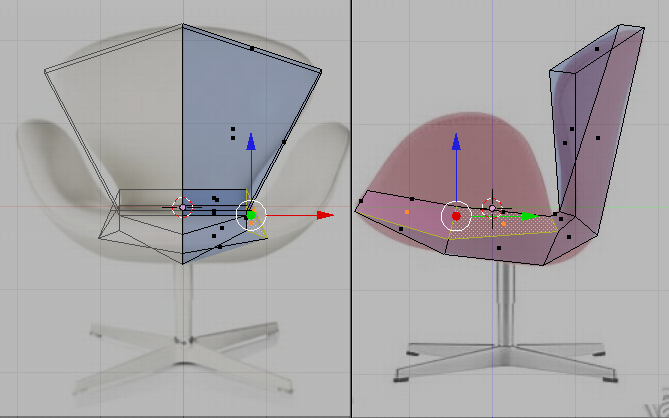
|
| Shaping the sides, faces to select |
Extrude the faces and adjust newly formed vertices to conform with the guide images.
::挤出面部并调整新形成的顶部以符合指导图像.
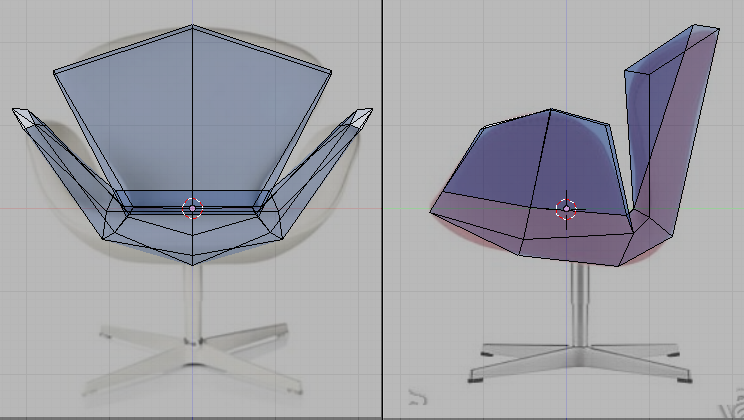
|
| Shaping the sides |
And now the oblique view.
::现在是斜视图.
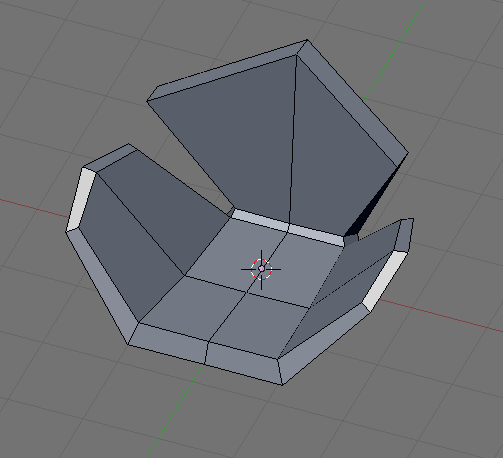
|
| Shaping the sides, oblique view |
The back still does not look good so add the following edge loop.
::背部仍然看起来不好,所以添加下面的边缘循环.

|
| Shaping the back again |
Adjust it.
::调整它
|
| Shaping the back again |
Remember to rotate your view to see problem areas.
::记住要转动视图以查看问题区域.
|
| Shaping the back again, oblique view |
Add this edge loop too.
::另外还要加上一个边缘循环.
|
| Shaping the back again |
Adjust.
::调整自己的生活.

|
| Shaping the back again |
And keeping with our good practice.
::并且保持我们良好的做法.
|
| Shaping the back again, oblique view |
Say, the form is finished. The loops are all in place and the form is easily identified as a rough model of the Swan chair.
::现在, 形状已经完成, 环子都在位,
Adding More Details
::增加更多细节
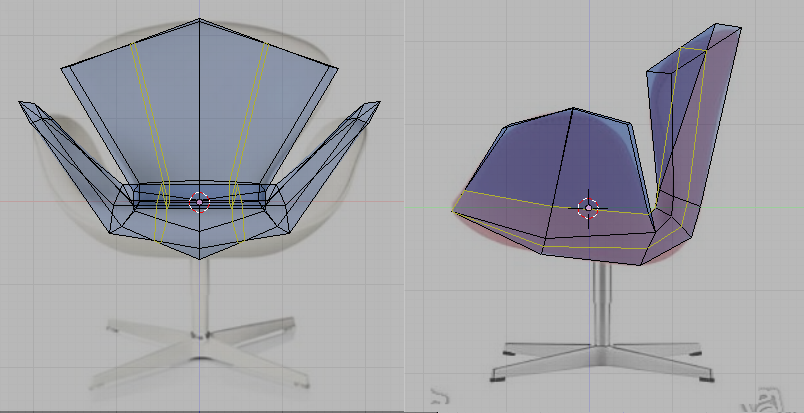
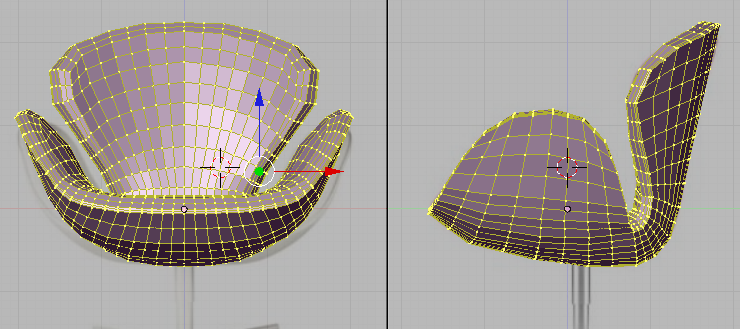
Now the basic form of the model is finished and with all important loops in place detailing this model is easy. Lets start by defining the back. Add these edge loops.
::现在模型的基本形式已经完成,所有重要的循环都在位,详细描述这个模型很容易.
|
| Add these loop |
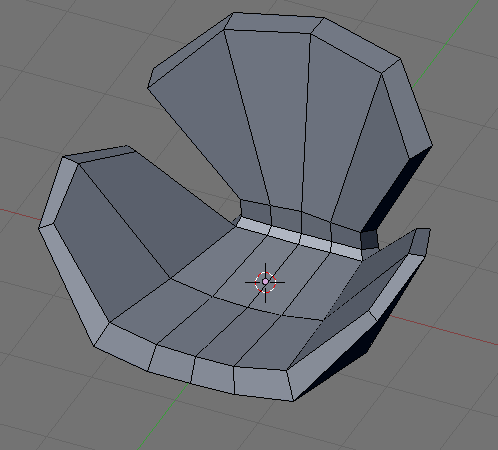
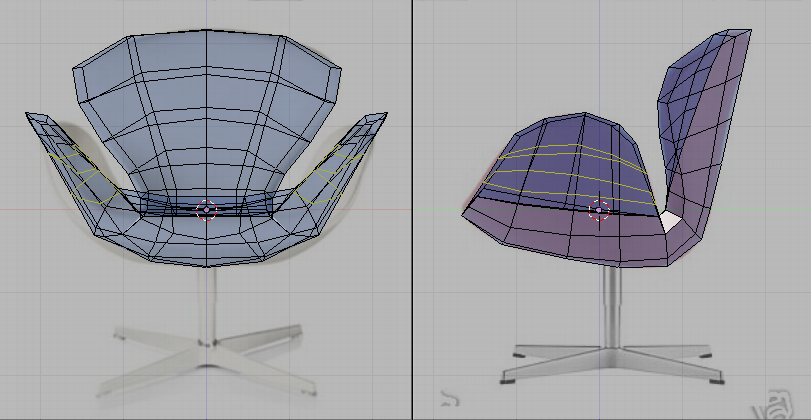
Move the newly created vertices to fit the references.
::移动新创建的顶点以适应引用.
|
| Adjust the form |
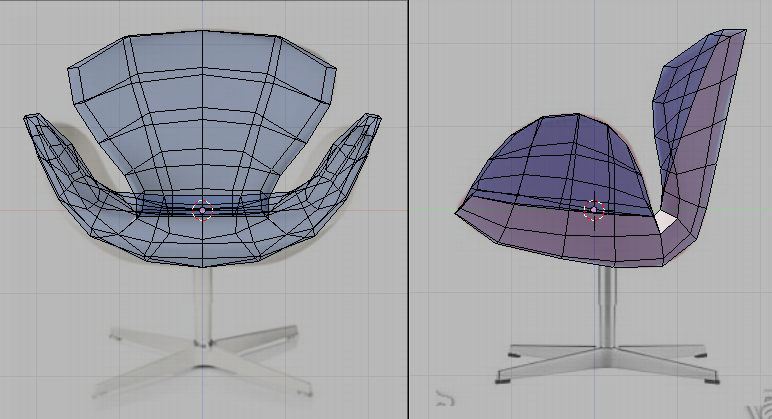
Be sure that the model looks right at various angles. The references images collected earlier will help. Adjust vertices if necessary.
::确保模型在各种角度看得对. 收集的参考图像将有助于. 如果需要,调整顶点.
|
| Our model |
The sides need to be taken care of too so add these edge loops.
::边缘也需要照顾,所以加上这些边缘环.
|
| Add these loops |
Then adjust the vertices.
::然后调整顶点.

|
| Refine |
This is how the model now looks like.
::这就是模型的现状.
|
| Our model |
Continue by adding these loops.
::继续增加这些循环.
|
| Add these loops |
And adjust as usual.
::像往常一样调整.
|
| Tweak |
Check that it looks good at other views too. Move vertices as necessary.
::检查其他视图是否也看起来很好.

|
| Our model |
Keep repeating this procedure. Add loops then adjust. Here is the loops that was added to the model. Tweaked after adding each.
::继续重复这个过程. 添加循环然后调整. 这里是模型中添加的循环. 在添加每个循环后调整.
|
| More loops |
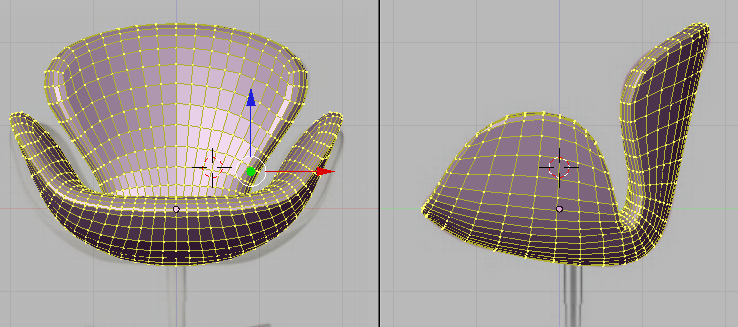
The outline of the chair needs rounding up. Add these loops and tweak so it looks like the one shown.
::椅子的轮需要向上圆. 加入这些环并调整,使它看起来像显示的那个.
|
| Rounding loops |
This is now how the mode looks like.
::现在的模式是这样的.

|
| Our model |
Its rather tedious to add more loops at this time so lets do a cheat. Select all vertices (press AKey a few times) and then subdivide (WKey -> 1Key) to add more vertices.
::现在增加更多循环是相当繁的,所以让我们做一个作弊. 选择所有顶点 (按AKey几次),然后分为 (WKey -> 1Key) 添加更多的顶点.
|
| Subdivide the whole mesh |
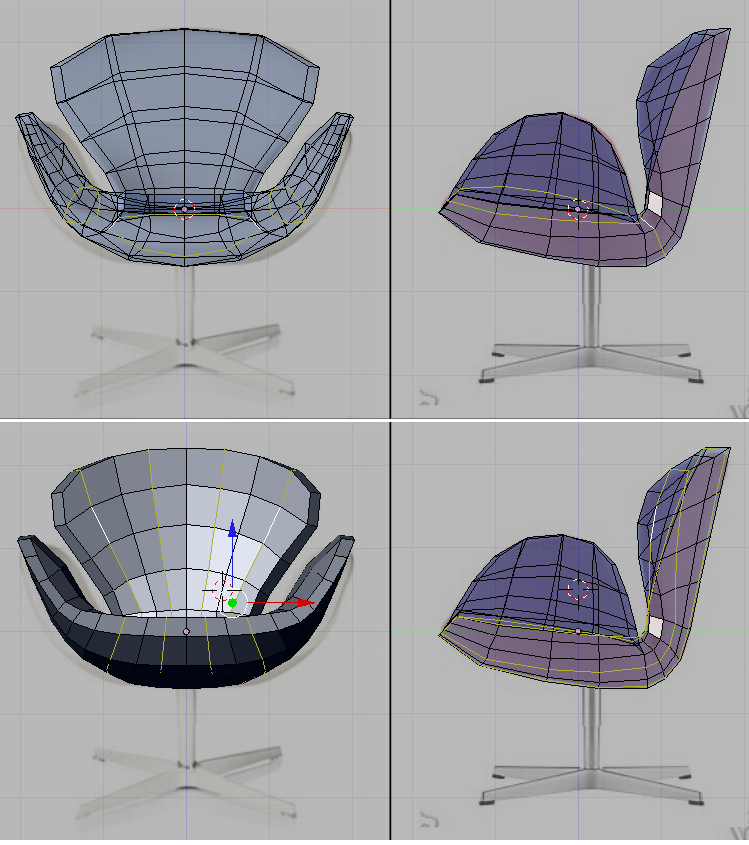
The model looks blocky so lets smooth it out. While the whole chair is still selected smooth the vertices by clicking Smooth a few times (Edit buttons ->Mesh tools -> Smooth; also available at WKey->Smooth). It would smooth out the model.
::模型看起来很块块,所以让它平滑. 整个椅子仍然被选择,通过点击平滑几次 (编辑按 -> 网格工具 -> 滑;也可在WKey-> 滑). 它会平滑模型.
|
| Smoothing the model |
Admire the work (and tweak if necessary).
::欣赏作品 (如果有必要,则进行调整).
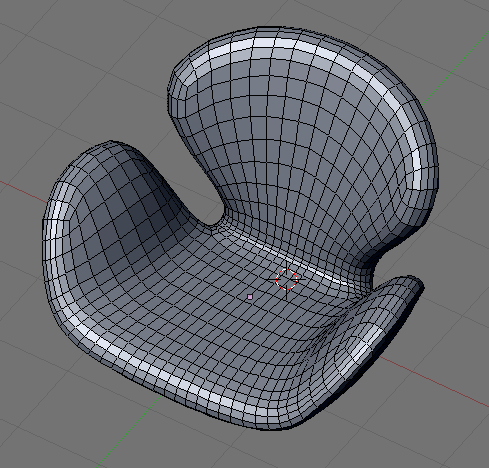
|
| Our model |
This is optional. Add this loop and scale along normal (Alt + Skey) to scale it in. Adjust vertices if necessary.
::这是可选的. 添加这个循环并沿正常 (Alt + Skey) 缩放以缩放. 如果需要,调整顶点.

|
| Modeling the seams |