在Blender中创建宝石
章节大纲
-
In this tutorial we will create a jewel in Blender. It is fairly simple. I recommend you do this tutorial if you are a noob, because it explains some basic features, but I suggest you read the tutorial syntax and the pages at the very beginning of this Wikibook first.
::在本教程中,我们将用Blender创建一个宝石.它相当简单.我建议你做这个教程,如果你是一个noob,因为它解释了一些基本功能,但我建议你先阅读教程语法和页面在这个Wikibook的开始.Modeling the jewel
::模拟宝石Start up Blender if you haven't already. There is a cube in top view (it looks like a square because it is in top view.) Delete it by pressing the X key. Then, to begin modeling, add a circle by pressing SPACE → Add → Mesh → Circle . Set the vertices to 10 and make sure it is not filled in. Then press OK.
::如果您还没有启动Blender.在顶部视图中有一个立方体 (因为它在顶部视图中看起来像一个方形).通过按X键删除它.然后,开始建模,通过按SPACE→Add→Mesh→Circle添加一个圆.将顶点设置为10并确保它没有填充.然后按OK.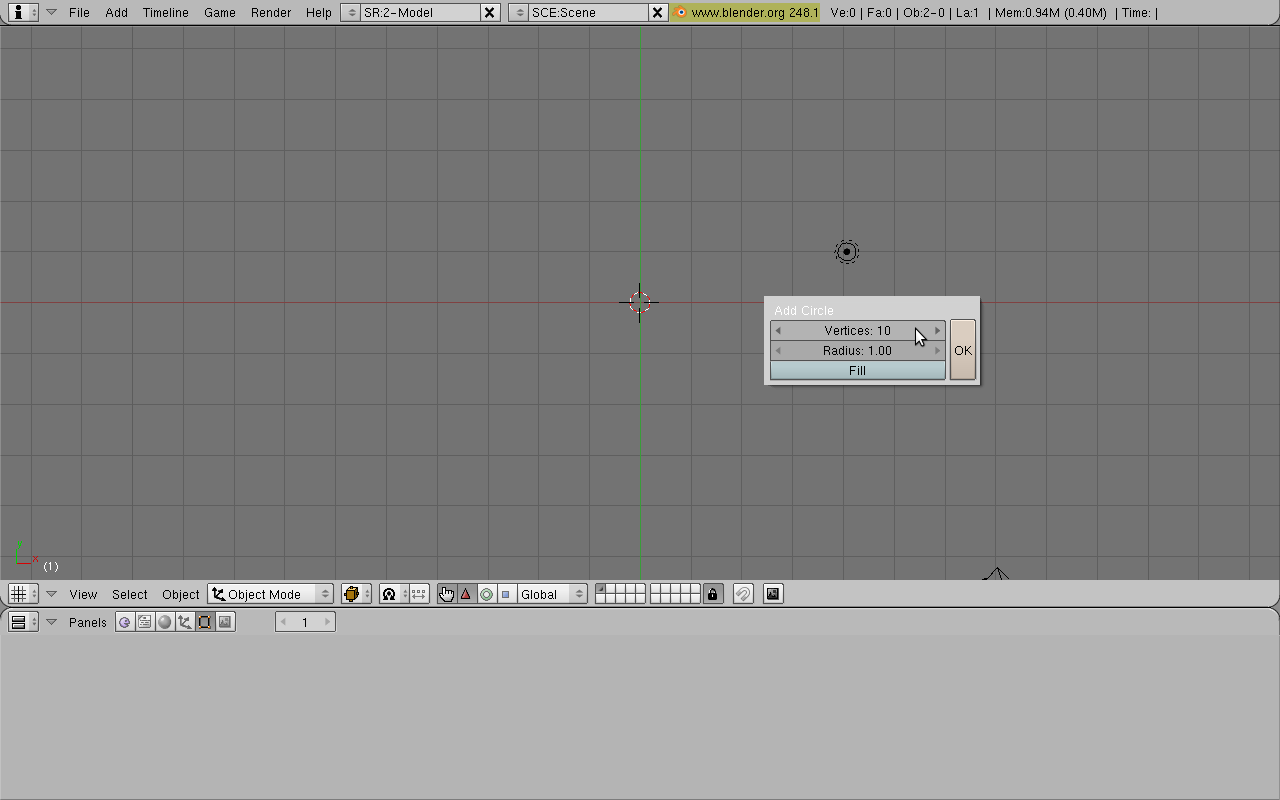
Next, we will extrude the vertices down. First enter side view by pressing Numpad 3 on your keyboard. As you can see, the circle is flat and not filled in. We will give it some depth. Switch to Edit Mode (TAB) and extrude the circle by pressing the E key and selecting "Only Edges". Move the mouse down and click to confirm the position (you may want to limit to Z axis by pressing the Z key).
::接下来,我们将向下挤出顶点.首先通过按键盘上的Numpad 3进入侧面视图.正如您所看到的,圆形是平的,而不是填充的.我们将给它一些深度.切换到编辑模式 (TAB) 并通过按E键和选择"仅边缘"挤出圆形.将鼠标向下移动并点击以确认位置 (您可能需要通过按Z键限制到Z轴).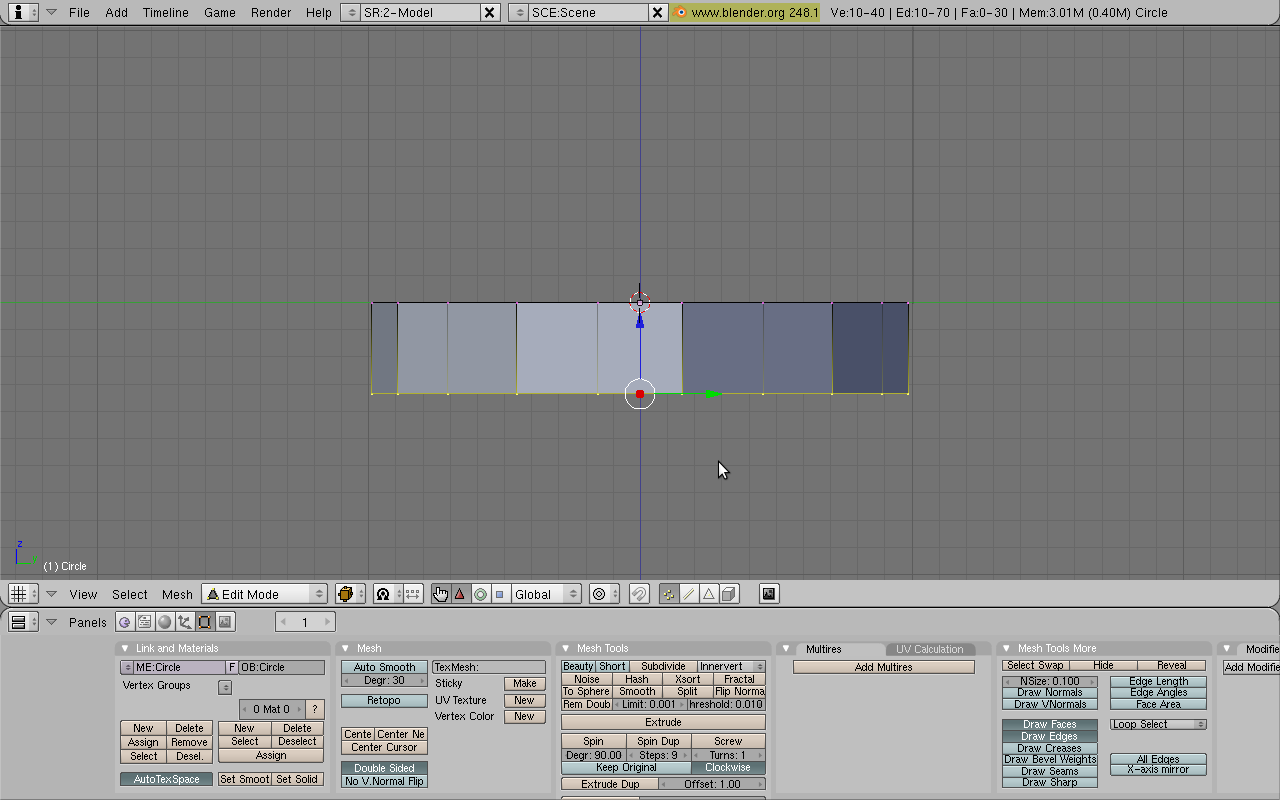
OK, what we just did is turn the circle into a hollow cylinder by extruding. But we don't want a cylinder. We want the bottom to be a nice tip. To do this, press Alt-M. This creates a Merging menu. Select "At Center". Now the bottom is a nice tip, like we want it!
::我们刚刚把圆圈变成一个空心圆柱体. 但是我们不需要圆柱体. 我们希望底部是一个漂亮的尖端. 要做到这一点,按 Alt-M. 这会创建一个合并菜单. 选择"在中心". 现在底部是一个漂亮的尖端,就像我们想要的那样!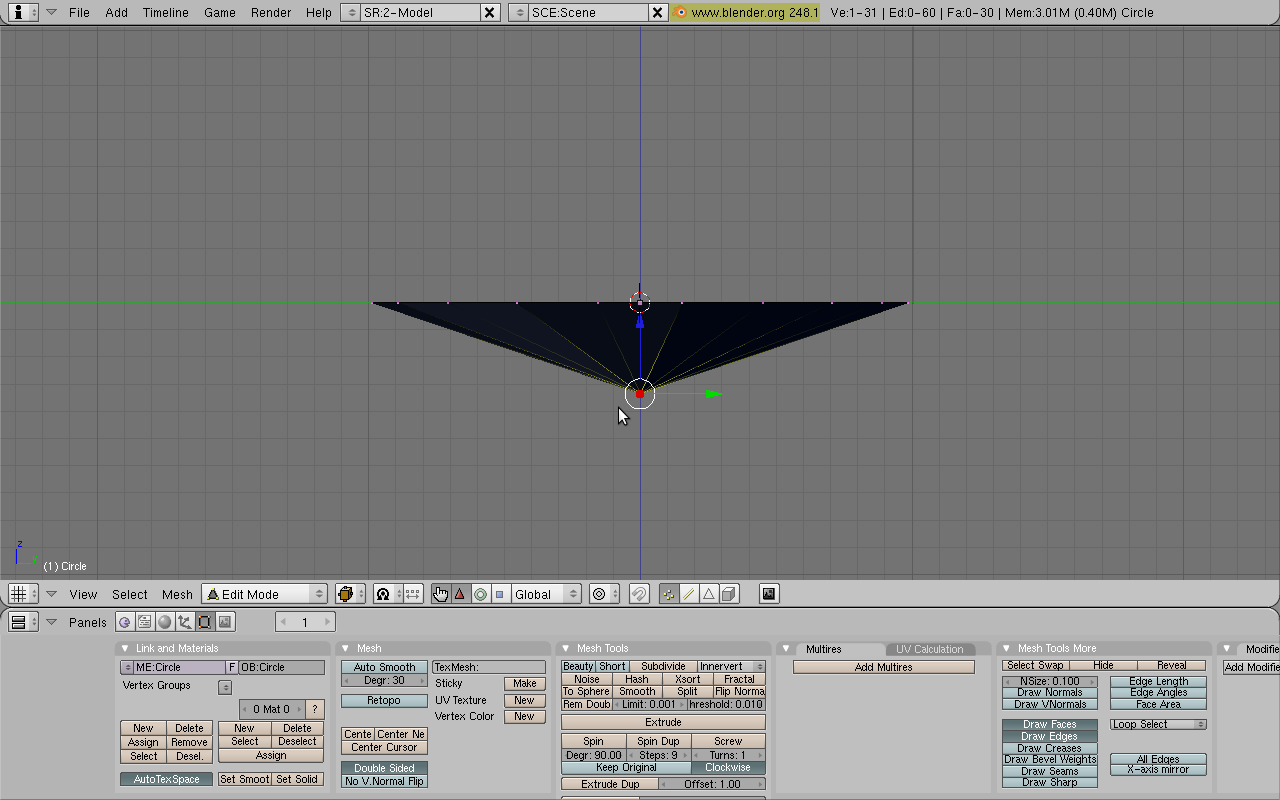
Now we will edit the top of the jewel. Press A to deselect everything and press the B key. This enters Box-Select Mode. Drag a box over the top vertices to select them.
::现在我们将编辑珠宝的顶部. 按A取消选项,然后按B键. 这进入了框选择模式. 拖动一个框在顶部的顶点上进行选择.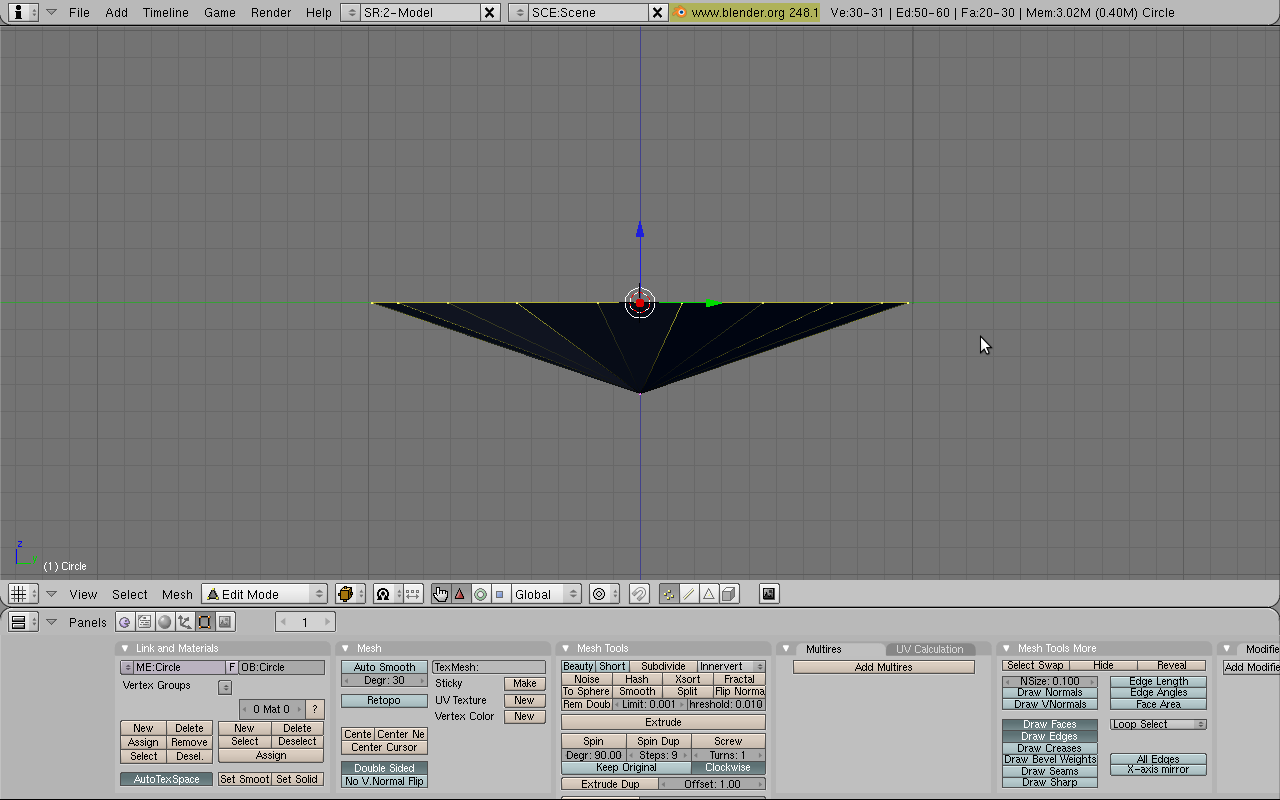
Now extrude the vertices upwards a bit (again: E key and "Only Edges"). Next, we will scale down these vertices to look a bit more like a jewel. Make sure the ring of vertices are selected and press the S key. This enters Scale Mode. Scale down the top vertices a bit and click to confirm.
::现在将顶点稍微向上挤出 (再次:E键和"只有边缘").接下来,我们将缩小这些顶点,使它们看起来更像一块宝石.确保顶点的环被选择并按S键.这进入了缩放模式.缩小顶点一点,然后点击确认.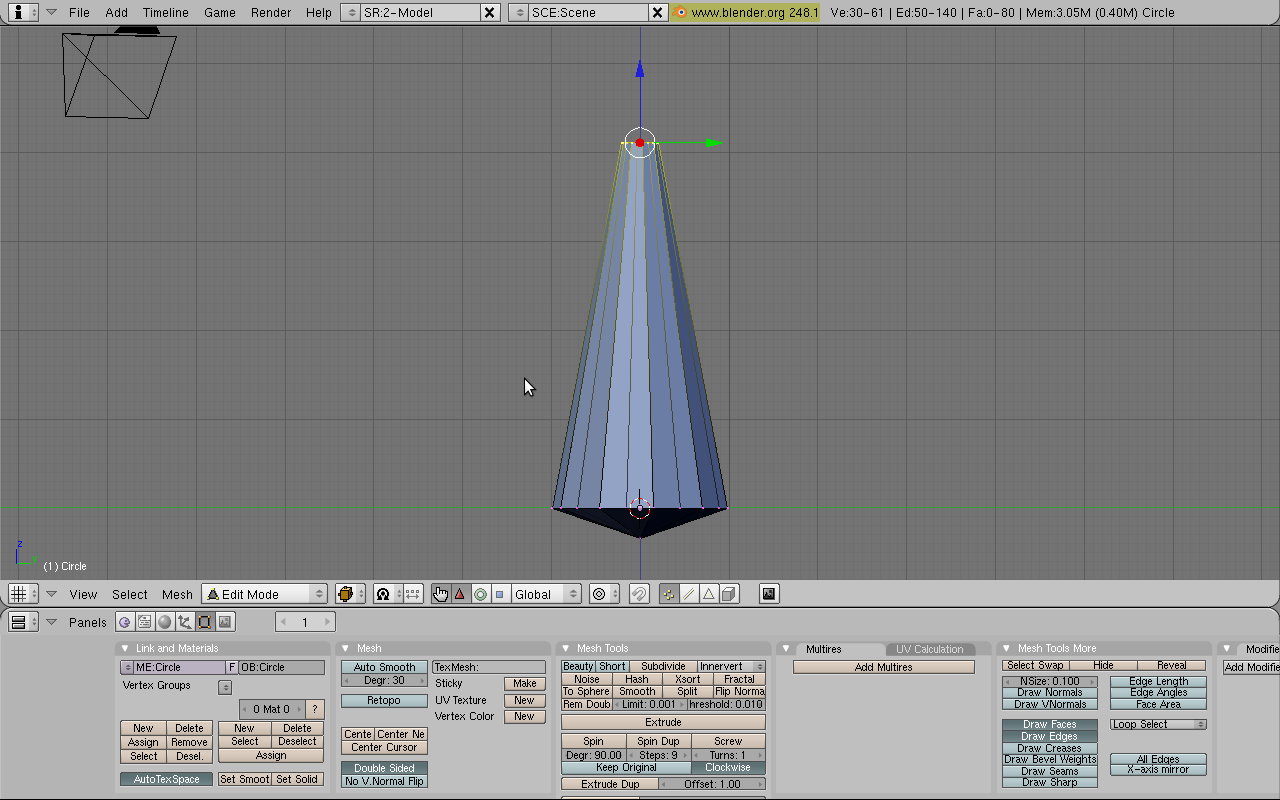
To look around your jewel model use the Middle Mouse Button or Alt-Left Click. Your jewel is looking fantastic! But there's a big gaping hole at the top. We'll fix that. First, enter side view (Numpad 3). Now extrude the topmost ring of vertices but don't move them anywhere with the mouse. If you are feeling doubtful, just press 0 and then Enter (or just click right mouse button). This makes a duplicate of rings placed over the original. Next merge this new ring with Alt-M -> At Center. This merges the duplicate ring, thus filling up your hole.
::为了查看你的珠宝模型,使用中鼠标按或 Alt-Left Click.你的珠宝看起来很棒!但顶部有一个大空洞.我们会修复它.首先,输入侧面视图 (Numpad 3).现在挤出顶端的环,但不要用鼠标移动它们.如果你感到疑惑,只需按0然后 Enter (或只需点击鼠标右键).这会使一个重复的环放置在原始的.接下来将这个新环与 Alt-M -> At Center合并.这将重复的环合并,从而填补你的洞.At last! Your jewel is finished! Feel free to rotate around it and make further adjustments if you are more advanced with using Blender.
::终于!你的宝石完成了!如果你使用混合器更先进,可以随意旋转它并进行进一步的调整.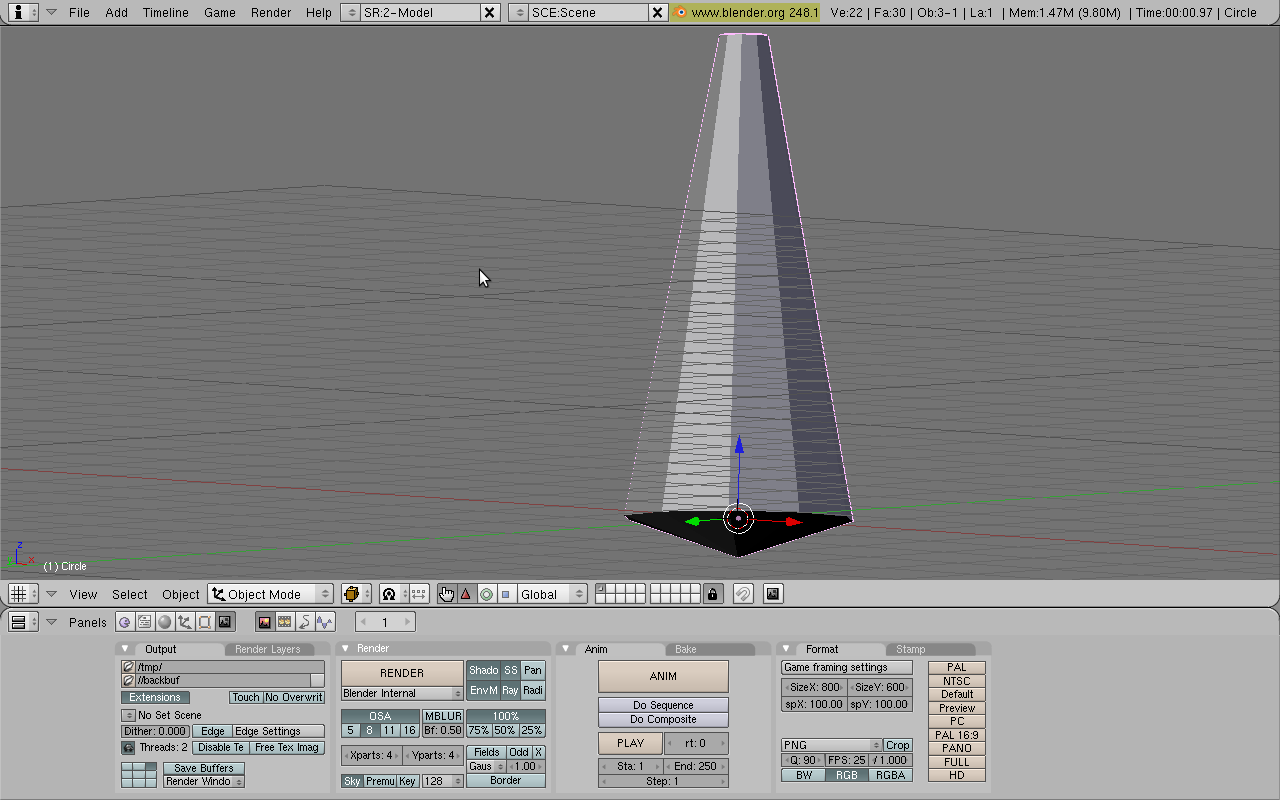
Shading
::遮阳Switch back to Object Mode (TAB) and show the Shading Panel (F5). Enable the Material Buttons (click on the button with a red ball). Add new material by clicking on "Add New" button in the "Links and Pipeline" tab. Copy the settings in the screenshot below. If you are having trouble setting the precise value to a slider, just click on the number. This allows a manual type-in. First, make it green by setting R to 0, G to 1, and B to 0. Next set the alpha slider to 0.458 (it looks like an A). Now press "Ray Mirror" (raytracing reflection) to turn it on and set it to 0.13. Now press "Ray Transparency" and set the IOR value to set 1.44. When you're done it should look like this:
::切换回对象模式 (TAB) 并显示遮光面板 (F5). 启用材料按 (点击红色球的按). 在"链接和管道"选项卡中点击"添加新"按添加新材料. 复制下面的截图中的设置. 如果您在设置滑块的精确值时遇到问题,只需点击该数字. 这允许手动输入. 首先,通过设置 R 为 0,G 为 1,B 为 0. 然后将alpha滑块设置为 0.458 (看起来像A). 现在按"射线镜像" (射线追踪反射) 打开并设置为 0.13. 按"射线透明度"然后将IOR值设置为 1.44. 当你完成时,它应该看起来像这样:
The finishing touch
::最后一个To improve the effect, add a plane underneath the jewel. In the Object Mode (TAB) press SPACE>>ADD>>MESH>>PLANE. Scale it 5 times using the S key. Then move it down a bit using the G key (press the Z key to restrict movement to the Z axis).
::为了提高效果,在珠宝下面添加一个平面.在对象模式 (TAB) 中按SPACE>>ADD>>MESH>>PLANE.使用S键缩放5次.然后使用G键向下移动一点 (按Z键限制移动到Z轴).You may try to render your jewel now. Press the F12 key. You may find that camera doesn't see whole jewel. Move and rotate the camera (using the G and R keys) to set it in the right position. You may want to switch to "Camera View" (Numpad 0) and try out "Camera Fly Mode" (SHIFT F). Try also moving the lamp and see what happens.
::您可以尝试现在染宝石. 按F12键. 您可能会发现摄像头看不到整个宝石. 移动和旋转摄像头 (使用G和R键) 设置到正确位置. 您可能想切换到"摄像头视图" (Numpad 0) 并尝试"摄像头飞行模式" (SHIFT F). 尝试移动灯,看看会发生什么.I've found that the jewel looks best with Ambient Occlusion on. So go to the Shading window, then the World buttons, click the Amb Occ tab and click the Ambient Occlusion button.
::我发现,如果使用环境遮蔽, 宝石的外观会更好. 所以,请进入"遮蔽"窗口,然后按"世界"按,Here is an example of what you can do:
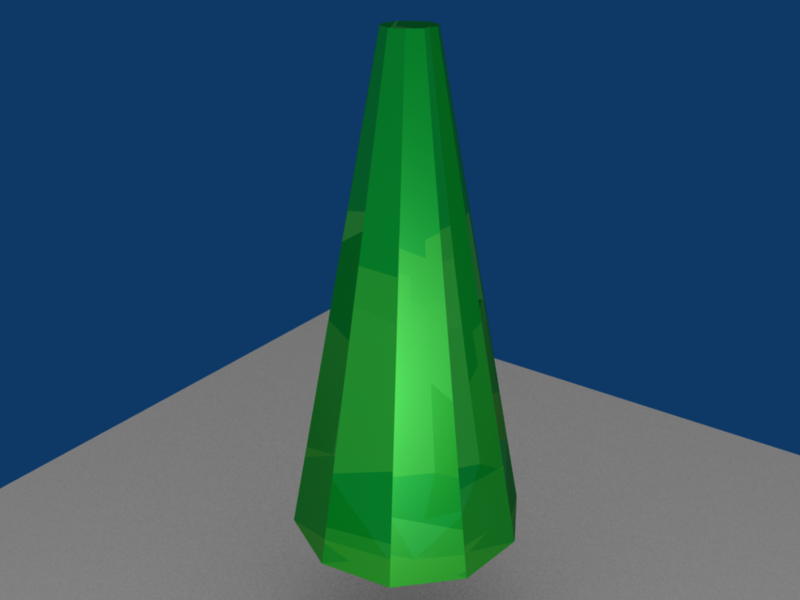
::以下是你可以做的事例:External links
::外部链接-
http://www.blender.org
::没有任何的 -
http://www.blenderartists.org
::通过一个新的平台,
-
http://www.blender.org