Blender 3D:零基础到专业级-单元2:基本建模和着色
Open a new default Blender document. Without doing anything else, hit F12 to render the default cube with the default settings. The result should look something like the image to the right.
::打开一个新的默认的Blender文档. 没有做任何其他事情,按F12来染默认的立方体与默认设置. 结果应该看起来像右边的图像.
Note the lower left visible face of the cube is completely black because the default light is at the upper right.
::注意,立方体的左下可见面是完全黑色的,因为默认灯在右上方.

Go back from the render to the 3D view ( F11 ). Now select (with RMB ) the default light, and either delete it or move it to another layer (with M ). Go to your World tab
![]() in the Properties
in the Properties
![]() window, and look for the Environment Lighting panel:
window, and look for the Environment Lighting panel:
::从染回去到3D视图 (F11). 现在选择 (用人民币) 默认灯,然后删除它或将它移动到另一个层 (用M). 进入属性窗口的世界选项卡,并查找环境照明面板:
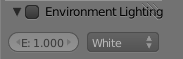
Check the box next to the title, and leave the “E:” (energy) value at its default 1.0. This gives us a pervasive, directionless light, illuminating all objects equally from all directions, which means there will be no shadows. Do another render, and it should now look like the image to the right.
::标题旁的框中勾选,并将 E: (能量) 值置于默认的 1.0. 这给我们一个无向的无方向的光,从所有方向均照亮所有物体,这意味着不会有阴影. 再做一次染,现在应该看起来像右边的图像.
See how we have gone from inky-black shadows to no shadows at all. In the real world, lighting is almost never perfectly uniform, and this variation of light and shade is important to help us distinguish details of the scene around us. Without such variations, everything devolves into featureless blobs.
::看到我们如何从墨黑的阴影变成没有阴影的. 在现实世界中,照明几乎从来没有完全均,光和阴影的这种变化是很重要的,帮助我们区分我们周围场景的细节. 没有这种变化,一切都变成无特色的斑块.

Now undo your deletion of the default lamp (or move it back to layer 1). Enable Environment Lighting again, but this time lower the Energy value to 0.1. Do another render, and it should now look like the image to the right. The shadowed face is still shadowed, but not enough to make it impossible to see any details it may have. This is usually the type of effect you want, unless you are aiming for really dramatic contrasts.
::现在,取消您删除的默认灯 (或将其移回1层).再次启用环境照明,但这次将能量值降低到0.1.做另一个染,它现在应该看起来像右图像.阴影面仍然阴影,但不够使它不可能看到任何细节.这通常是你想要的效果,除非你目标是真正戏剧性的对比.
So the lesson is:
::所以我们要学到的教训是:
|
|
A single light is rarely enough for a good looking scene.
|
As you learn more, you will find that it is common to use two or three lights, or even more, to ensure proper illumination of a scene. In simple tutorials, where no explicit details are given about lighting, you can probably get by with the default light, plus some environment lighting (as we added earlier) to soften the shadows.
::随着你学习更多,你会发现通常使用两三灯,甚至更多,以确保场景的适当照明.在简单的教程中,没有明确的细节关于照明,你可能可以通过默认的光,加上一些环境照明 (如我们之前添加) 软化阴影.