Blender 3D:零基础到专业级-单元2:基本建模和着色
Level: intermediate
::水平:中等
Building a better (procedural) eyeball!
Originally created by Jon McKay (Ammusionist) and posted on blenderartists.org/forum
[1]
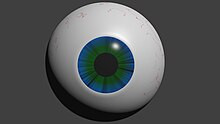
The end result of this tutorial is an eyeball that fulfills the following requirements:
::构建一个更好的 (程序) 眼球!最初由Jon McKay (Ammusionist) 创建并发布在blenderartists.org/forum上[1] 本教程的最终结果是一个满足以下要求的眼球:
-
Single mesh
- I wanted to be able to append a single object into any project.::单一网格, 我希望能够将单一的对象附加到任何项目中.
-
Procedural Textures
-
I didn't want to have to rely on image maps that could get lost.
::我不想依赖可能会丢失的图像地图.
-
I didn't want to have to rely on image maps that could get lost.
-
Versatile
-
One single model to be used for any type of character, be it human, alien or whatever.
::任何类型的角色都可以使用一个单一的模型,
-
One single model to be used for any type of character, be it human, alien or whatever.
-
Easy
-
Any effects needed to be quickly accessible. I don't want to be wasting time faffing around with colour-band settings at the texture level
::任何效果需要快速访问. 我不想浪费时间在纹理层面的颜色带设置
-
Any effects needed to be quickly accessible. I don't want to be wasting time faffing around with colour-band settings at the texture level
-
Impressive
-
This sucker needs to look good any way it goes.
::这种蛋需要看起来不错的任何方式.
-
This sucker needs to look good any way it goes.
-
One other thing I really wanted was the iris musculature to follow the pupil dilation!
::我还想让虹膜肌肉跟随瞳孔扩张.
An old and different Tutorial:
::一个古老而不同的教程:
-
Very old video for making deep-looking eyes [
[2]
]
::制作深视眼的非常古老的视频 [2]
Creating the Mesh
::创建网格
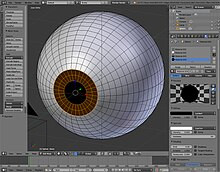
The objective here is to make a great looking eyeball. That means it may not be anatomically perfect, but there are some things we need to take into account: The eye should consist of a white (white bit with veins); an iris (coloured bit); a pupil (black but in the centre of the iris) and a cornea (clear bit surrounding the whole eye). These may not be absolutely correct, but these are how I'm referring to the pieces of the eye.
::眼球的目的是要做出一个很好的眼球. 这意味着它可能在解剖学上不完美,但我们需要考虑一些事情:眼睛应该由白色 (带有静脉的白色部分),虹膜 (有色部分),瞳孔 (黑色但在虹膜的中心) 和角膜 (环绕整个眼睛的透明部分) 组成. 这些可能不是完全正确的,但这些是我指眼睛的部分.
-
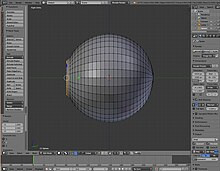
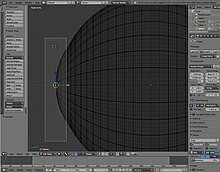
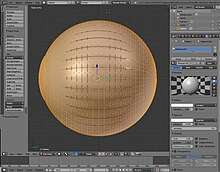
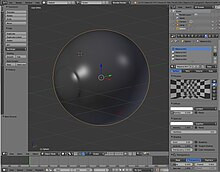
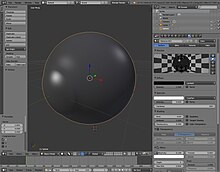
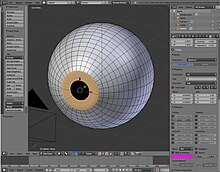
Start with a ball: Go to a front view ( 1KEY ) and create a UV sphere. 32 Rings and 32 segments should be sufficient. It'll give us plenty of smoothness and enough verts to work with when we create shapes.
::首先用一个球:进入前视图 (1KEY) 并创建一个UV球. 32个环和32个段应该足够. 这将给我们足够的光滑和足够的绿色来创建形状. -
Click on "Align to view"
::按一下"对齐以显示" -
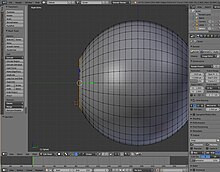
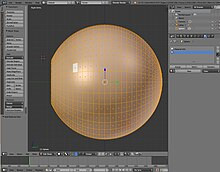
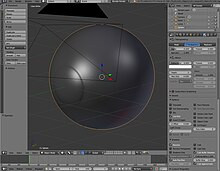
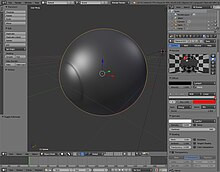
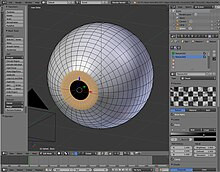
This sphere will become the coloured parts of the eye, but we also need a second sphere for the cornea. Use the Z key to switch to a wireframe view (if you're not already there). Hit the A key a couple of times to ensure all points are selected then Shift + D to duplicate the sphere.
::眼睛的色彩将由这个球体组成,但我们还需要第二个球体用于角膜.使用Z键切换到线框视图 (如果您还没有到达).按A键几次以确保所有点被选中,然后按Shift+D重复球体. -
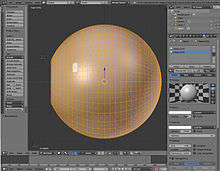
Press S key to scale and scale the second sphere to slightly larger than the first. (Hint: Hold Shift while scaling for fine adjustment) or you could also enter a value, 1.01.
::按下S键调整尺寸,然后将第二个球体调整为比第一个球体稍大一些. (提示:在调整尺寸时按住Shift以进行微调) 或者您也可以输入1.01的值. -
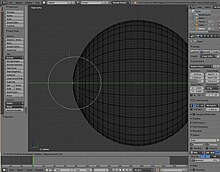
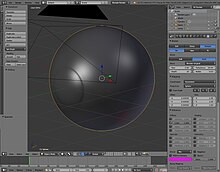
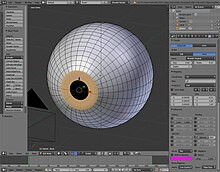
Now that we have a nice confusing mesh, we're going to make our life easier. We're going to hide the outer bit for the moment. Hit the H key.
::现在我们有了一个很好的混网,我们将使我们的生活更容易. 我们将隐藏外部比特一下. 按H键. -
Noob Note:
Don't panic like I did the first time I accidentally hit H , you can bring it all back with Alt + H . (Note: In blender Alt + some key often reverses the effect of pressing the key in the first place!)
::笔记:不要像我第一次不小心按H时那样惊慌失措,你可以用Alt+H把所有东西都带回来. (笔记:在混合器中,Alt+一些键通常会逆转按键的效果!)
-
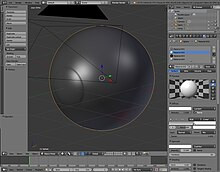
OK Now to create the basic mesh for the inner part. Basically, we need to make a concave iris/pupil section.
::现在要创建内部部分的基本网格. 基本上,我们需要做一个空的虹膜/瞳孔部分.
-
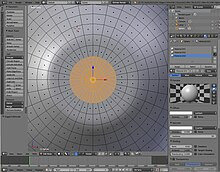
Make sure you’re in Orthographic view.
::确保您在正写视图中. -
Switch to a side view and use the Border Select ( B ) to select the first 4 rings and the tip. Now we're going to flatten these. Press S for scale Y for Y axis only and 0KEY for scale-to zero.
::切换到侧面视图,使用边界选择 (B) 选择前4个环和尖端. 现在我们将平整这些. 按S为Y轴的Y尺度,按0KEY为0的尺度.
For more realistic eyes you can also grab the inner 3 rings + the tip a bit inwards the eye.
::眼睛的内侧三环和尖端可以稍微向内.
Noob Note:
It is also possible to flatten the rings in a way that leaves the last ring in place and moving the rings later is not necessary. Before you flatten those 4 rings and the tip of the sphere place your 3D cursor in the plane where the last ring involved in scaling operation lies (use border select to select
only
the fourth ring, press Shift + S , and select "Cursor to Selected"). Then set the pivot point to "3D Cursor". Finally proceed like instructed above by selecting all rings to be flattened and scaling them to 0 in Y direction. This time the outermost ring will stay in place. Do not forget to set the pivot point back to the default option "Median Point". You may return the 3D cursor to the center by pressing Shift + C .
::笔记:还可以使最后一个环保持平坦,并且不需要稍后移动环.在平坦之前,将4个环和球的尖端放在最后一个环位于平面上的3D光标 (使用边界选择仅选择第四个环,按Shift + S,并选择"Cursor to Selected").然后将转点设置为3"D光标".最后,按照上述指示,选择所有要平坦的环并将它们缩小到Y方向的0.这一次,最外的环将保持原样.请不要忘记将转点设置为默认选项"中位点".您可以通过按Shift + C将3D光标返回中心.
-
Last, grab them along the Y-axis to the eye till it's round again.
::最后,沿着Y轴抓住它们,直到眼睛又圆了.
-
Now for the cornea. It's not perfectly spherical; it bulges slightly at the front. We're going to use the Proportional Editing tool.
::现在是角膜. 它不是完全球形, 在前面稍微凸起. 我们将使用比例编辑工具.
-
First, we need to un-hide the cornea. Hit Alt-H to make it visible.
::首先,我们需要揭开角膜的隐藏. -
Click the O-Key, this will activate proportional editing, click on "Connected" in the 3D view header at the settings for Proportional editing.
::按一下O键, 这将激活比例编辑, 在3D视图头部的"连接"按一下比例编辑的设置. -
Select the type of falloff: “Sphere Falloff”
::选择落下的类型: 球落下的 -
Press A-Key a couple of times again to make sure no points are selected, switch to a side view (Keypad-3) and right click just to the left of the front-most point. We just want to select the tip vertex.
::按一下A键再几次以确保没有点被选中,切换到侧面视图 (键盘-3) 并右键点击最前面点的左边. 我们只想选择尖顶. -
Now comes some fun. We want to drag that point away from the eye in the y axis, so press “G” for grab and “Y” for Y axis. As you move the vertex, you'll see a circle that defines the influence of the proportional editing. Adjust it so it is as the height of the whole iris and drag it out until it looks right.
::现在有趣的. 我们要把这个点从眼睛拉到 y 轴上,所以按下 G 抓取和 Y 抓取. 当你移动顶点时,你会看到一个圆形,它定义了比例编辑的影响. 调整它,使它作为整个虹膜的高度,然后拖出它,直到它看起来对.
-
First, switch off Proportional editing.
::首先,关闭比例编辑. -
Select from center the tip and the first 4 Loops.
::从中间选择尖端和前4个循环.
-
Then Hit Ekey and Ykey then drag out a bit 'till it's good.
::然后打Ekey和Ykey然后拖出一点'直到它是好的.

-
To clean the model up, we're going to apply a subdivision surface modifier and some smoothing.
::为了清理模型, 我们将使用一个分区表面修饰器和一些光滑.
-
Go to Modifiers in the Properties Header and hit new and choose "Subdivision Surface" choose view: 2.
::选择"分区表面"选择视图: 2. -
Hit Tab to switch to Object mode and hit the "Set Smooth" button in the Link and Materials panel.
::按下"Tab"切换到"Object"模式,然后按下"Set Smooth"按在"链接和材料"面板中.
-
Now would be a good time to save your work before we go on to textures.
::现在是时候把你的工作保存起来,
Adding the Textures
::添加纹理
You're going to need multiple materials on this mesh. It's possible to apply materials to selected faces.
::您需要多种材料来制作网格.
-
Press A a couple of times to ensure nothing is selected.
::按A一两次以确保没有任何选项. -
Press Z to switch off wireframe; this will be easier without it.
::按下Z关闭线框; 这将更容易没有它. -
Place the mouse pointer in the centre of one of the faces on the outside layer of the eye and press “L” to select linked faces. If you get a message saying “Nothing Indicated” try positioning the pointer on a different face and try again.
::放置鼠标指针在眼睛外层的面部之一的中心,然后按下L来选择链接的面部.如果您得到一个"没有指示"的消息,请尝试将指针放在不同的面部,然后再尝试.
-
Once the outside section is selected, go to “Materials” in the Properties Header, click “+”. Click “Assign” to assign the outside faces to Material.001.
::一旦选择了外面部分,请进入属性标题中的"材料",点击"+".点击"分配"以将外面分配到"材料001".
-
Now the inside.
::现在是内在.
-
Hide the outside faces (H-Key). We'll assign the rest from the eye. If a face is already assigned to a material and you assign it to another, it just switches material.
::隐藏外面的面孔 (H-key).我们将从眼睛分配其余部分.如果一个面孔已经被分配给一个材料,你将其分配给另一个,它只是切换材料.
-
Press A to select all and, as above, click “+” then click “Assign” so it is assigned to Material.002.
::按A选择所有,如上所述,点击+,然后点击赋值,以便它被赋予材料.002.
-
Now for the iris and pupil.
::现在是虹膜和瞳孔.
-
Hit A to deselect all.
::按A取消所有选项. -
Switch to a front view and zoom in. Hit “C” to enable circle select and select the central faces plus one ring out. You can control the size of the selector by rotating your mouse wheel.
::切换到前视图并放大.按C启用圆形选择并选择中央面以及一个外环.您可以通过旋转鼠标轮来控制选择器的大小. -
Again, create a “+” material index and “Assign” the pupil faces to it.
::创建一个"+"的材料索引,并"分配"学生面对它.
-
Finally, click Akey to deselect all and use circle select again to select the remaining faces on the iris. Assign them to a new material.
::最后,点击Akey取消选择所有,并再次使用圆圈选择来选择虹膜上的剩余面. 将它们分配给新材料.

-
Now we're ready to make the materials.
::现在我们准备好制造材料了.
Cornea Material
::视角膜材料
-
Switch to object mode (Tab). Go to Material.001.
::切换到对象模式 (Tab). 进入"材料.001".
We'll start with the simplest texture first. The cornea is basically just colourless and transparent. This is because some lighting conditions make the eye under the cornea difficult to see. Go to the shading buttons (F5)
::眼睛的角膜是无色的,透明的. 这是因为某些照明条件使眼睛难以看到角膜下面的部分.
-
Locate the “Transparency” control. Set this on. This means as we go we'll be able to see through the cornea. Note that we're using Z-Transparency instead of Raytrace. And set Alpha to ".2"
::找到"透明度"控制. 设置这个. 这意味着我们可以通过角膜看到. 注意我们使用Z-透明度而不是Raytrace. 并将Alpha设置为 ".2" -
Diffuse at white and intensity is 0.1.
::在白色和强度是0.1的扩散. -
Under Specular CookTor is used 1 and Hardness is 333.
::在光镜度下使用1和硬度为333. -
Under Mirror, Click on, and set to 0.4, Depth is 3
::在镜子下,点击,并设置为0.4,深度为3 -
Unclick the 'Traceable' setting under Options
::在选项中取消点击"可追踪"设置 -
And Under Shadow unclick "Cast"
::在"影子"下,取消"播放"
White Material
::白色材料
The white of the eye's a little trickier. The material here includes some red veins that can be seen at the side of the eye, but not from the front. This can be done with two textures, but there's a cheat we can use.
::眼睛的白色有点棘手. 这里的材料包括一些红色的静脉, 可以在眼睛的侧面看到, 但不是从前面. 这可以用两个纹理, 但我们可以使用一个骗局.
First, the veins:
::首先,静脉:
Switch to Material.002.
::切换到材料002.
Go to the texture Properties aside of the from the Material:
::转到"材料特性"的页面:
Make a new texture.
::创造一个新的纹理.
Use a marble texture, and copy these settings.
::通过使用大理石纹理,
-
Under color choose Ramp.
::在颜色下选择Ramp. -
The first point is "0": Pos=0; R=1, G=0.0, B=0.0; A=1;
::第一个点是 "0": Pos=0; R=1, G=0.0, B=0.0; A=1; -
Click on the second point, The second point is "1": Pos=0.340; R=1, G=1, B=1; A=1;
::按下第二点,第二点是"1":"Pos=0.340;R=1,G=1,B=1;A=1; -
Under the Marble tab: Sharper, Sin, and under "noise", hard are clicked;
::在"大理石"选项卡下:更,罪,在"噪音"下,硬点击; -
Size=2; NoiseDepth=10; Turbulence=26.04;
::尺寸=2;噪声深度=10;流=26.04; -
And set under mapping "Coordinates" to "Generated". And "projection" to "sphere" or "Flat".
::在"坐标"下设置"生成",在"投影"下设置"球体"或"平面".
The two colour band items are shown here separately. This makes a nice marble texture that will evenly cover the eyeball. So how to hide it from the front of the ball? Another colour band trick, but this time in the material itself.
::两种颜色带的物品在这里分别显示. 这使得一个漂亮的大理石质地,将均地覆盖眼球. 那么如何隐藏它从球的前面? 另一个颜色带的技巧,但这一次在材料本身.
Here they are in all their glory.
::它们的如火.
-
Under the material tab, Diffuse is white and intensity is 1;
::在材料标签下,扩散剂是白色的,强度为1; -
Check Ramp, 0: Pos=0.533; R=1, G=1, B=1; A=0; Input is Shader;
::检查拉,0:Pos=0.533;R=1,G=1,B=1;A=0;输入是遮光器;
-
1: Pos=0.544; R=1, G=1, B=1; A=1; Input is Normal;
::1: 位置=0.544; R=1, G=1, B=1; A=1; 输入为正常;

The colour band items are both white with one alpha 0.0 and one alpha 1.0. As you can see they are very close together to give a fairly clear line that the veins will stop at. The input setting for the band is set to “Normal” this means the left hand side of the band refers to faces that are parallel to the camera view and the right is faces that are facing directly towards the camera.
::颜色带的物品都是白色的,其中一个是alpha 0.0和一个是alpha 1.0.正如你所看到的,它们非常接近,以提供一个相当清晰的线,静脉将在此停留.带的输入设置为"正常",这意味着带的左侧指的是与相机视图平行的面,右侧是直接面向相机的面.
There's also some colour band fun to be had with the pupil material.
::学生们还可以玩一些彩乐乐队的乐趣.
Pupil Material
::学生的材料
I wanted a nice black texture, but I also wanted to get a red-eye effect if a light is shone directly at it from behind the camera. Why? I guess just because I can, and now so can you!
::我想要一个漂亮的黑色纹理, 但我也想要得到红眼效果如果光线从摄像机后面直接照射到它. 为什么?我想只是因为我可以,现在你也可以!
As before move to Material.003.
::像之前一样,转到材料.003.
There are no textures in this one. It's basically black and a little reflective with a nice hard specular.
::这张没有纹理. 它基本上是黑色的, 有点反射,
-
Diffuse is Black, presumably with an Intensity of 1
::散射是黑色的,可能是强度为1 -
Specular is white with an Intensity of 0.6 and a Hardness of 300;
::镜面是白色的,强度为0.6和硬度为300; -
Under Mirror reflectivity is 0.1;
::在镜子下反射率为0.1;
If you want to have the red-eye effect, have a good look at the colour band settings though! (Not Necessary, and maybe not wanted by everyone)
::如果你想有红眼效果,请仔细看看颜色带设置! (不必,也许不是每个人都想要的)
-
Check Ramp.
::检查一个道. -
0: Pos=0.970; R=0, G=0, B=0, A=0;
::0: 位=0.970; R=0,G=0,B=0,A=0; -
The second is fully red (with no blue or green). We want the red-eye to respond to light not angle like the white of the eye.
::红眼的反应是对光的,而不是对视角的反应. -
1: Pos=1; R=1, G=0, B=0, A=1; Input: Energy;
::1: 电位=1; R=1, G=0, B=0, A=1; 输入: 能量;
Now the bit you've all been waiting for – the iris!
::现在大家都在等待的部分, 虹膜!
Iris UV Map
::虹膜紫外线地图
Save your work and grab a cup of coffee for this part. It's a little involved.
::节省你的工作,拿一杯咖啡来做这部分.
We need the texture to stay glued to the mesh irrespective of the shape of the mesh. This gives the effect of the muscles in the iris expanding and contracting. In a nutshell, we're going to UV map a procedural texture to a single part of the mesh.
::无论网状的形状如何, 纹理都必须粘在网状上. 这就使虹膜肌肉扩张和收缩. 简而言之, 我们将UV地图绘制为网状的单个部分.
OK, here we go. Switch material.004. You'll need to be able to see both 3D view and UV/Image editor. This can be achieved by splitting windows, if you don't know anymore how to do this read
the "Blender Windowing System" module
again. Noob note: If you rendered the image of the eye you will see the rendered image, we want an empty grid. So click the "X" in the Datablock (Image) choose-section in the UV/Image editor Header.
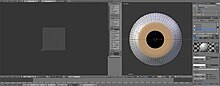
::现在我们开始. 切换材料.004. 你需要能够看到3D视图和UV/图像编辑器. 这可以通过分开窗口来实现,如果你不知道如何再读"混合器窗口系统"模块. 无人注意:如果你染了眼睛的图像,你会看到染的图像,我们想要一个空格子. 所以点击"X"在数据块 (图像) 选择部分中的UV/图像编辑器头部.

Make sure the window is displaying a front view (Keypad-1) this will be important when we unwrap the bit we're going to use.
::这将是我们打开要使用的位时的重要.
Change the 3D view to edit mode en Face select mode.
::改变3D视图以编辑模式和面对选择模式.
-
Hide the outside (cornea) as done before.
::隐藏外侧 (角膜) 正如之前所做的. -
Go to Material.004 and click on "Select" right of "Assign", this will select the to the material assigned faces. We will unwrap the faces to place our texture.
::选择"选择"的右侧的"分配", 这将选择给材料分配的面. 我们将解开面部放置我们的质地.
-
You can use these properties for the iris material:
::您可以使用这些特性来对虹膜材料进行测试:
-
Diffuse: black but with an intensity of 1
::散射:黑色,但强度为1 -
Specular: Intensity: 0
::镜子:强度:0
-
Now search in the tool shelf for the Shading/UV's tab, you will find there the "Unwrap" button under "UVs".
::现在在工具架上搜索"遮阳/紫外线"选项卡, 在"紫外线"下, 你会发现"解封"按. -
Click it and select "Unwrap". The unwrap tool, is a tool which you can position a texture. You can allocate the places in the texture to the mesh by positioning the unwrapped faces in a grid. The texture can be an image or another texture and will be used at the places, that are described in the unwrapped image in the "UV/Image editor"
::打开工具,是一个工具,你可以定位一个纹理.你可以通过将未打开的面部放置在网格中来分配纹理中的位置.纹理可以是图像或其他纹理,将用于在"UV/图像编辑器"中描述的位置. -
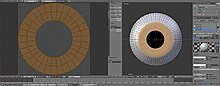
Zoom in 'till it's placed exactly to the outer edge the "UV/image editor" window.
::放大到它被放置在"紫外线/图像编辑器"窗口的外边.
-
The image window should now contain a nice even circle of dots. If they aren't selected anymore, put the cursor in the "UV/Image editor" and press “A” to select all the points. Now select each ring in turn using Alt-Shift, starting from the innermost, and scale them until they cover from the centre to the outside of the image grid as shown. (This won't affect the mesh)
::图像窗口现在应该包含一个漂亮的点圈.如果它们不再被选择,请将光标放入"UV/图像编辑器"并按A来选择所有点.现在使用Alt-Shift轮流选择每个环,从最内在开始,并缩放它们,直到它们从图像网格的中心到外面覆盖,如图所示. (这不会影响网格)
Now we've got a map, lets get a texture. In the 3D view "Tab" to object mode for the next part. If the UV/Image editor is in your way you can merge the two windows. If you don't know anymore how to do this read
the "Blender Windowing System" module
again.
::现在我们有了地图,让我们得到一个纹理. 在3D视图"标签"到对象模式下一个部分. 如果UV/图像编辑器在你的方式,你可以合并两个窗口. 如果你不知道如何再这样做,再次阅读"混合器窗口系统"模块.
Iris Texture
::虹膜的质地
Firstly, a texture to control the colour blend across the iris. Generally it starts on the outer edge dark and gets lighter as it moves to the centre. Sounds like a job for the blend texture.
::首先,一种可以控制虹膜色彩混合的纹理. 通常它从外边开始暗, 移向中心时变得更浅. 听起来像是混合纹理的工作.
-
Create a new texture for Material.004 at the Texture Properties in the Properties Header. It will be called "Texture.001".
::在属性标题中的"纹理属性"中创建一个新的纹理. -
Change Type to Blend.
::改变类型为混合. -
create a second texture with type: Clouds
::创建一个第二个纹理: 云
The texture itself is fairly straight forward, but again, the colour band is where the magic happens.
::虽然质地本身是相当直观的, 但再一次, 颜色带是魔法发生的地方.
There are two stops in the colour band. Note the alpha values. This blend texture is meant to tint the iris texture so it's lighter in the centre and darker in the outside.
::颜色带有两个停止点. 注意α值. 这种混合纹理是为了调色虹膜纹理,
We make a Blend texture and a clouds texture (yes clouds)
::我们做一个混合纹理和云纹理 (是的云)
Now for that iris texture:
::现在对于虹膜的纹理:
Blend texture:
::混合物质地:
The blend texture is applied to the UV map input. The green colour is used as a lighten mix to tint the iris near the centre.
::混合纹理应用于UV地图输入.绿色被用作亮化混合物来调色中心附近的虹膜.
-
Select Ramp,
::选择一个道, -
(Blue) 0: pos: 0, play with the color settings and set alpha to 1
:蓝色) 0:pos:0,玩色调设置,并设置阿尔法为1
-
(Green) 1: pos: 0.009, play with the color settings and set alpha to 0.89
::绿色:第一种:0.009, 玩色调设置, 将alpha设置为0.89 -
set progression to Spherical
::设置进展到球形 -
Set mapping to Coordinates: UV, Projection: Flat
::将映射设置为坐标:紫外线,投影:平面
Now you've got color
::现在你有了颜色
Clouds texture:
::云的纹理:
The colour band points are black with alpha 0 and white with alpha 1.
::颜色带点为黑色的字母为 alpha 0 和白色的字母为 alpha 1.
-
0: pos: 0, black with alpha: 0
::0: pos: 0,黑色的字母是: 0 -
1: pos: 0.737, black with alpha: 1
::1: 位数: 0.737,黑色与α: 1 -
Under Clouds: Grayscale, Noise: Hard
::云层下:灰度,噪音:强 -
size: 0.4, depth: 2
::尺寸:0.4 深度:2 -
here is (together with the UV mapping) the magic of the lines: Mapping Coordinates: UV, Projection: Flat
::这里是 (与紫外线映射) 的线条的魔力:映射坐标:紫外线,投影:平 -
Important:
Size X: 0.01, Y: 5
::重要:尺寸X:0.01,Y:5 -
Under influence - Geometry - Normal: 1
::在影响下 - 几何 - 正常: 1
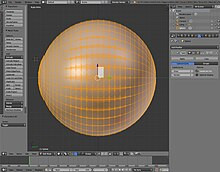
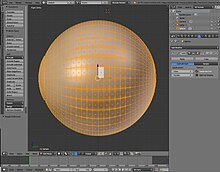
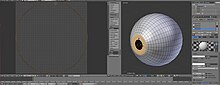
This texture is applied to UV again and. This makes some small shadows in the iris when the light is from the side. Add some lights and have a look at your eyeball so far.
::通过这种方法,我们可以将眼睛的光线从侧面照射到虹膜,使其产生阴影.
Pupil Dilation
::瞳孔扩大
We're going to use shape keys to create the pupil effects.
::我们将使用形状键来创建瞳孔效果.
We're going to create a normal eye and a cat's eye. Fortunately, the fully dilated eye is the same in both cases so that's going to be our shape key basis.
::我们将创建一个正常的眼睛和一只猫的眼睛.幸运的是,完全扩展的眼睛在两种情况下都是一样的,所以这将是我们的形状关键基础.
Noob Note:
note that you can only set a "Shape key" in object mode.
::需要注意的是, 您只能在对象模式中设置"Shape键".
-
Go to Object Mode and go to the "Shape Keys" properties in the "Object data" (The triangle one) context in the "properties" header.
::进入"物体模式",然后在"属性"标题中的"物体数据" (三角形一) 文本中,进入"形状键"属性. -
Click “Add Shape Key” to create the "basis".
::点击"添加形状键"以创建"基础". -
Make 3 extra Shape keys. (Don't make a shape key after editing, because you will change the previous keyframe and that is not the intention)
::编辑后不要创建形变键,因为你会改变之前的键框,而这不是目的.
-
Go to "edit mode" and click on Shape Key 1.
::进入"编辑模式"并点击"形状键1". -
Use circle select, Alt+Shift of de Select button in Material to select just the first 2 loops en the tip (pupil) in vertex select mode.
::使用"选择圆圈",Alt+Shift或"选择"按在"材料"中,仅选择顶点选择模式中的前2个循环和尖端 (学生). -
Now scale this to the next loop, select the latter and scale to just before the edge of the iris (This gives a very wide pupil). It has to be as wide as possible because you can adjust how wide you want it in the shape key section. It is just a maximum so you can simply make an animation.
::现在将其缩放到下一个循环,选择后者,并缩放到虹膜边缘前 (这给出了一个非常宽的瞳孔). 它必须尽可能宽,因为你可以在形状键部分调整你想要的宽度. 它只是最大值,所以你可以简单地做动画. -
Change the name to “Wide Pupil Contract”
::改名为"宽眼合同"
-
Just because you may also need it make a very little pupil (with shape key 2). Call it (Little Pupil).
::只是因为你可能还需要它做一个非常小的学生 (与形状键2). 打电话给它 (小学生).
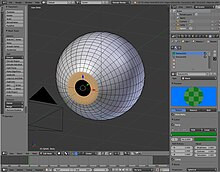
Use the value slider in "Object mode", also set Viewport shading to Rendered (so you can see how it will be when rendered), To increase the shape of the pupil with "Wide pupil Contract" and make it smaller with "Little pupil" you can use them at the same time also (and much more if preferred).
::通过"宽瞳孔合约"来增加瞳孔的形状,并通过"小瞳孔"使其变小,您可以同时使用它们 (如果喜欢,可以使用更多).
Now switch back to object mode and try the shape key sliders out. Pretty neat huh?
::现在重新切换到对象模式, 试试形状键滑块.
-
Let's make a cat's eye now. Change the name of Shape Key 3 to -”Cat Pupil”.
::现在让我们做一只猫的眼睛.把形状键3的名称改为"猫的瞳孔". -
Use the same method as before to scale the edge loops. As you scale, restrict your scaling to the X axis (That is “S” then “X”). You should end up with a shape key tiny but medium long.
::使用前面的方法来缩放边缘循环.当你缩放时,限制你的缩放到X轴 (即S然后X).你应该最终有一个小而中长的形状键.

That's pretty much it. Try some other things to practise with this.
::试试其他东西来练习.
Set the Camera and lightning.
::设置摄像机和闪电.
Note: Due to the settings you've done in the material of the white of the eye, you have to position the camera in front of the eye. Because the white of the eye that overrules the vein-texture is a white spot in the middle of the camera and that has to be placed in the middle of the eye around the iris.
::注意:由于您在眼睛白色的材料中做了设置,您必须将摄像机放置在眼睛前面. 因为眼睛白色覆盖了静脉纹理是摄像机中间的白点,并且必须放置在眼睛中间,围绕虹膜.
Don't forget to save – and enjoy!
::别忘了保存,享受!
