Blender 3D:各种各样的教程
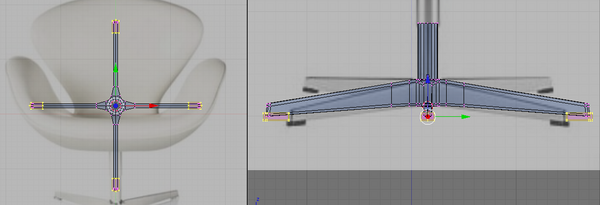
Now the seat is finished, time for the legs for it to stand on.
::现在座位已经完成, 脚也可以站起来了.
Starting Primitive
::起始于原始
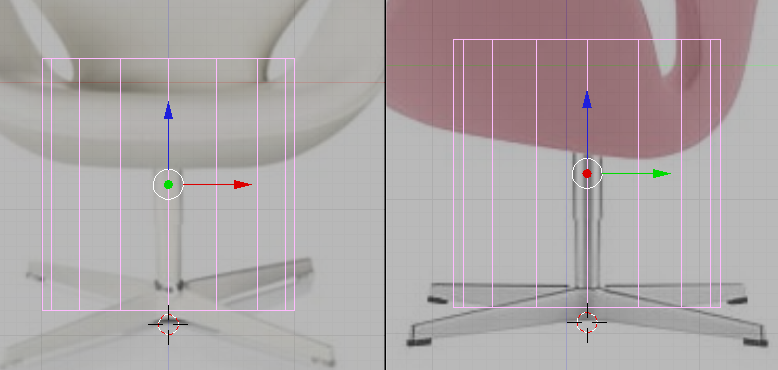
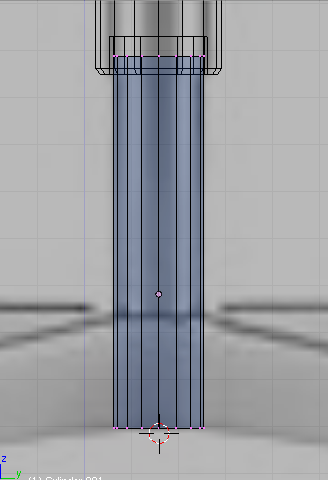
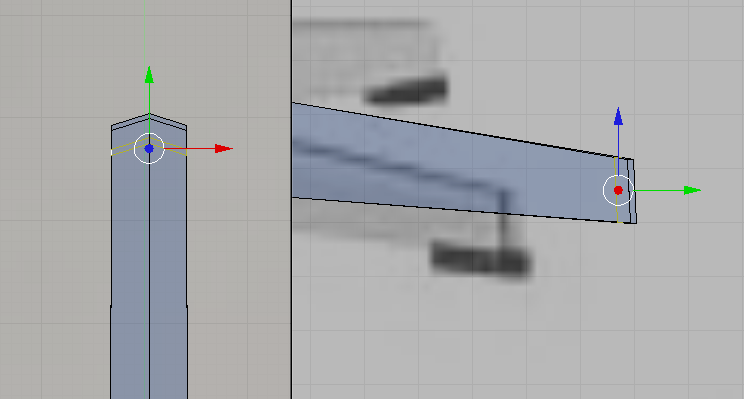
The leg is mainly made up of cylinders so a cylinder is a very good primitive to start. In object mode add a cylinder with 16 vertices.Center the cylinder on the upper part of the telescope.
::脚主要由圆柱体组成,因此圆柱体是一个非常好的原始开始.在对象模式中,添加一个16个顶点的圆柱体.将圆柱体放在望远镜的上部.
|
| Adding the cylinder primitive |
Tip: to make the cylinder centered relative to the seats center, while in object mode select the seat then hit Shift+Skey (Snap options) then select Cursor->Selection. The 3d cursor would be moved to the center of our seat. Now when you add the cylinder, the cylinders center would be located at the cursor which is also at the seats center. Now all you have to do is to move the cylinder along the y and z axis because it would be properly located relative to the x axis.
::提示:要使圆柱体与座位中心相对中心,在对象模式中选择座位,然后按Shift+Skey (快捷选项),然后选择Cursor->Selection. 3d光标将移动到我们座位的中心. 现在当您添加圆柱体时,圆柱体的中心将位于光标的位置,它也位于座位的中心. 现在您只需要沿y和z轴移动圆柱体,因为它将与x轴相对正确地位置.
Hide or move the Seat to another layer so that it would not intrude while modeling the leg.
::隐藏或将座椅移动到另一个层,以便在模拟腿时不入侵.
The Upper Telescope
::上层望远镜
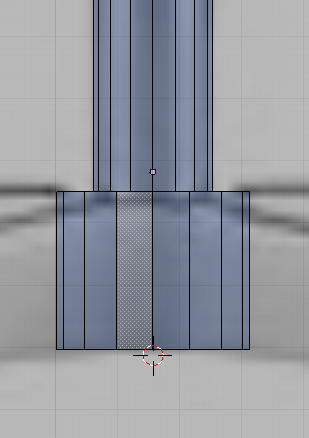
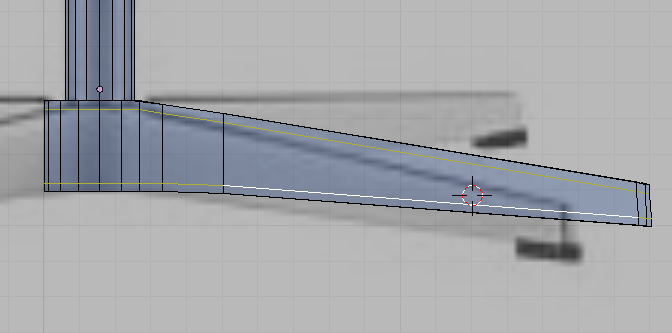
Go to edit mode and scale the cylinder until its radius match the radius of the upper telescopic element of the chair's leg. Then move the top and bottom vertices to match the reference.
::进入编辑模式,并缩放圆柱体,直到它的半径与椅子腿的上方望远镜元件的半径相匹配.然后移动上下顶点以匹配参考.

|
| Modifying the primitive to fit reference |
Extrude the bottom part and place it a little lower. Extrude again and right click so that the newly created vertices would remain in their position. Scale the vertices a little. Extrude again and move the extruded region up the cylinder.
::挤出底部部,将其稍微下放.再次挤出,然后右键,使新创建的顶部保持在原位置.稍微缩小顶部.再次挤出,将挤出区域移动到圆柱上.
|
| Shaping the bottom of the telescope |
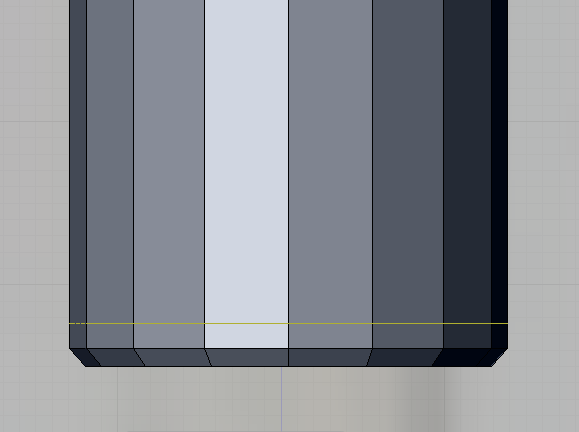
Remove the top and bottom vertices that cap the ends.
::移除顶部和底部顶部,以覆盖端.
|
| Opening ends |
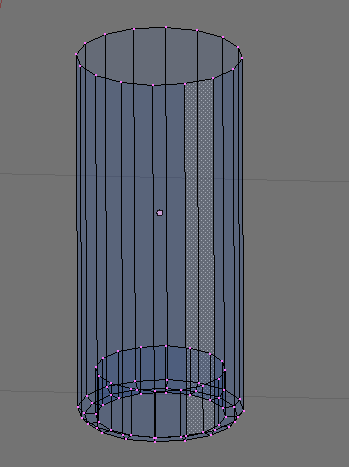
We will be using subsurf modifier to make this part smother. Add this loop to constrain the smoothing on this area.
::添加这个循环来限制这个区域的平滑.
|
| Adding control loop |
The Lower Telescope
::下层望远镜
Now lets start with the lower part. Add a cylinder in object mode and adjust the newly created vertices to match the reference.
::现在让我们从下面开始. 在对象模式中添加一个圆柱体, 并调整新创建的顶点与参考相匹配.
|
| Start modeling the lower telescopic part |
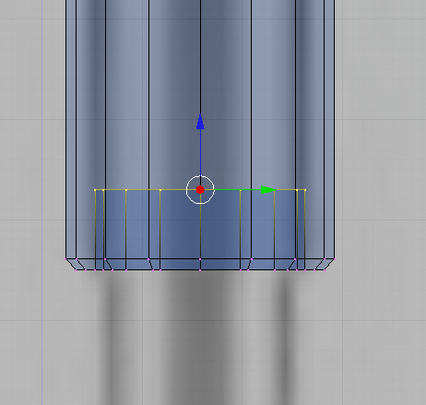
The legs would be extruded from this cylinder. Add this loop to prepare.
::脚将从这个圆柱体中挤出.

|
| Add this loop to enable extrusion of legs |
Select the faces between the newly added loop and the bottom loop. Extrude this faces but right click after extrusion so the extruded faces remain in their position. Now scale them constrained along the xy-plane (Skey->Shift+Zkey) a little. This is how it should now look.
::选择新添加的循环和底部循环之间的面. 挤出这些面,但在挤出后右键,以便挤出面保持在它们的位置. 现在将它们沿 xy 平面 (Skey->Shift+Zkey) 缩小一点. 这就是它现在应该看起来.
|
| Forming the base |
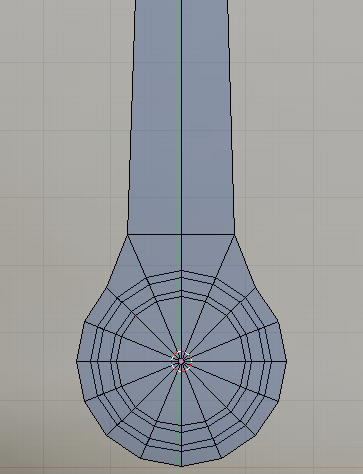
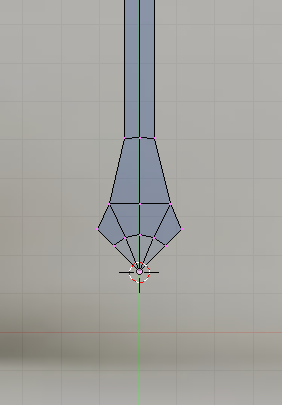
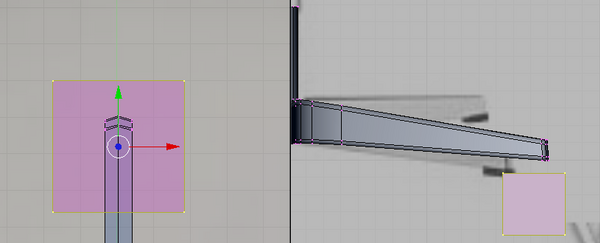
In top view select the two topmost faces and extrude to form the back leg. Shape the tip according based on the reference. Here is the steps taken to shape the tip. First after extruding, Constrained scale the tip along the x-axis (SKey->XKey) to make the tip thinner. Then move the tip lower. Deselect all, then select the top vertices of the tip and lower this vertices further.
::在顶部视图中选择两个最顶面并挤出以形成后腿.根据参考来塑造尖端. 以下是塑造尖端的步骤.首先在挤出后,限制沿x轴 (SKey->XKey) 缩小尖端以使尖端变薄.然后将尖端移动到下方.取消所有,然后选择尖端的顶点并进一步降低这些顶点.

|
| Extruding a leg |
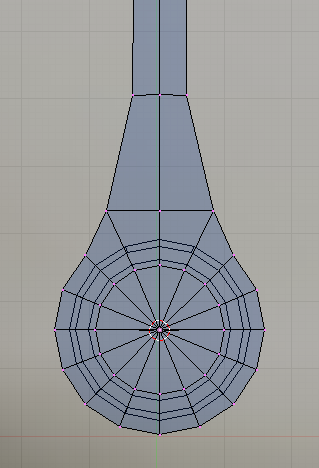
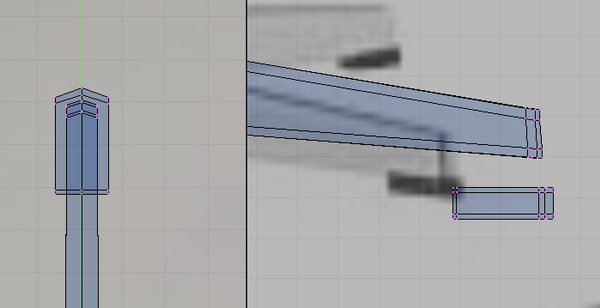
Shape the base as shown bellow. This is done by selecting the vertices where the leg connects to the base then constrained scaling it along the y-axis to zero (Skey->YKey->0key). Then move the scaled vertices further back.
::根据下图形状的底部.这是在选择脚与底部连接的顶点,然后在y轴上缩小到零 (Skey->YKey->0key) 时完成的.然后将缩小的顶点进一步向后移动.
|
| Shaping the leg |
Then add an edge loop as shown bellow. constrained scale the newly created edgeloop along the x-axis to make it thinner.
::然后添加一个边缘循环,如下图所示. 沿 x 轴限制新创建的边缘循环,使其更薄.
|
| Shaping the leg |
We will be using the subsurf modifier to smooth our model so lets add the following edge loops so that the model will smooth properly. Add an edgeloop at the tip.
::我们将使用底面修饰器来平滑模型, 让我们添加以下边缘循环, 让模型正确地平滑. 在端子上添加一个边缘循环.
|
| Adding control loop |
And this loops on the side.
::这条环在侧面.
|
| Adding control loops |
Also remove the vertex that cap the top because we will not be needing it and it would cause smoothing artifact when subsurfed.
::另外还要去除顶部的顶点, 因为我们不需要它,

|
| Shaping the leg |
Now how about the other legs? We will be using Spin duplicate tool to make those. In top view select the central vertex then snap our 3d cursor to it.
::现在怎么样?我们将使用旋转复制工具来制作它们. 在顶部视图中选择中央顶点,然后将我们的3D光标点击到它.
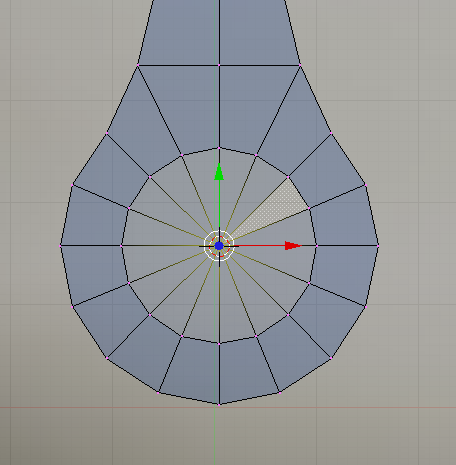
|
| Relocate 3d cursor to the center of the base |
Now remove the other part of the cylinder as shown. We would be left with a quarter part of the whole leg assembly.
::现在把圆柱体的另一部分移除, 就像图中所示的那样. 我们将留下整个腿部组件的四分之一.
|
| Delete extra vertices |
Select all the vertices that are left. Change the parameters of the spin tool to this: degrees to 360, steps to 4. Click on the "Spin Dup". If you have multiple 3d views, your mouse cursor would turn into a question mark. Move your cursor to the top view and then click. The other legs would appear as shown bellow. This legs are made of separate mesh and the original leg have a duplicate at exactly the same position creating double vertices. Connect the mesh and remove the doubles by selecting the whole mesh then remove the doubles (Wkey->Remove Doubles).
::选择所有剩余的顶点. 将旋转工具的参数更改为: 度为 360,步骤为 4. 点击"旋转Dup". 如果您有多个3d视图,鼠标标标将变成一个问号. 将标 cursor移动到顶部视图,然后点击. 其他脚将显示如下图. 这种脚是由单独的网格,原始脚有一个重复在完全相同的位置创建双顶点. 连接网格和删除双重点,选择整个网格,然后删除双重点 (Wkey->Remove Doubles).
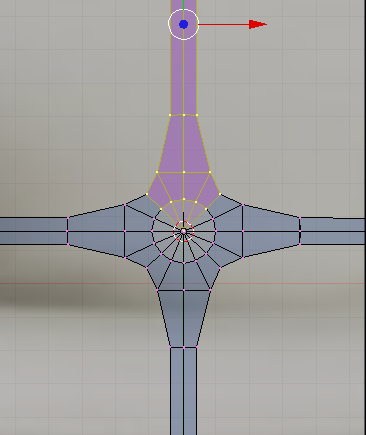
|
| Spin duplicating other legs |
The Stops
::停留点
Now lets create the Black Stops on every tip of the leg. We would be creating this joined to the legs as one object then separate it later. Its just that it seems more easy that way.
::让我们在每条腿上创建黑色的停止. 我们将把它连接到腿上,然后将它分开. 这样看起来更容易.
Without leaving edit mode, add a cube. scale an move it to one of the tip. Move the cube so that it would be lower that usual to separate it from the other mesh making it easier to edit it without disturbing the others.
::在不离开编辑模式的情况下,添加一个立方体. 缩放一个移动到一个尖端. 移动立方体,使其比平时更低,以将其与其他网格分开,使其更容易编辑而不扰乱其他网格.
|
| Primitive for the stops |
Shape the cube to match the tip. This should be easy by now. The whole step is left out.
::立方体的形状与尖端相匹配. 这应该很容易. 整个步骤被遗漏了.

|
| Shape the primitive |
Subsurf would be used to this too so add extra loops to control how the mesh would be smooth.
::另外, 另外一个方法是,
|
| Stop with control loops added |
Now make copies of the stops using the Spin Duplicate tool. Don't forget to remove the doubles.
::现在使用旋转复制工具复制停止. 不要忘记删除双重.
|
| Creating the whole stops with Spin duplicate tool |
Select all the tips then move them together up until they intersect with the tips of the legs.
::选择所有的尖端然后把它们一起移动,直到它们与腿的尖端交叉.
|
| Positioning stops |
Now lets separate separate meshes to individual objects. Press Pkey and select "all loose part" option.
::现在让我们将单独的网格分开为单个对象. 按P键,选择"所有松散的部分"选项.
|
| Separating the Stops |
Notice that the other part of the mesh would suddenly change in appearance. Don't worry. It just means that those meshes are now separate objects by themselves. If you go to object view you would now be able to select the leg and the tips as separate objects.
::另外,如果我们把它看成一个单独的物体,那么我们将会看到它是什么样子.
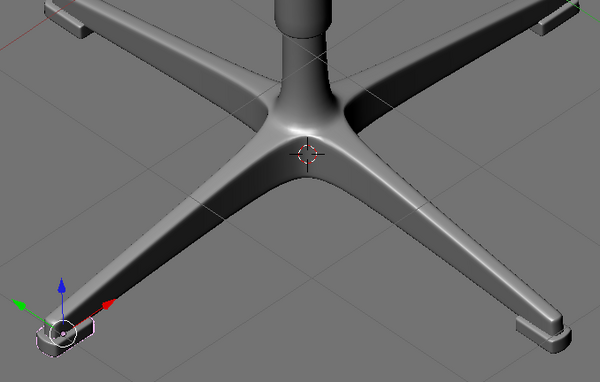
There are some issues though when you use the subsurf modifier on the leg base as shown.
::虽然当你使用脚底上的下面修饰器时会出现一些问题,
|
| Unwanted smoothing effect |
Select the leg and go to edit mode. Add the following edge loop.
::选择脚并进入编辑模式. 添加以下边缘循环.

|
| Adding control loop |
Scale the base loop too as shown.
::根据图表,也可以缩放基环.
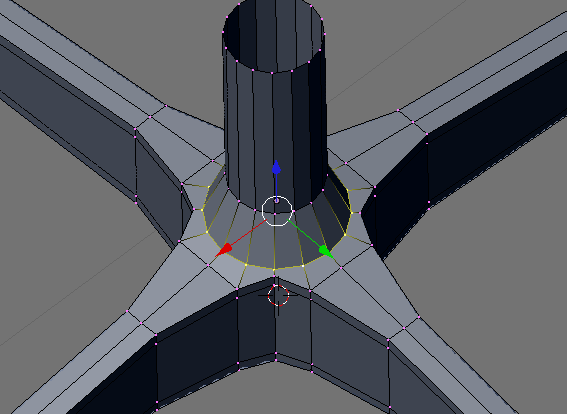
|
| Scale lower loop |
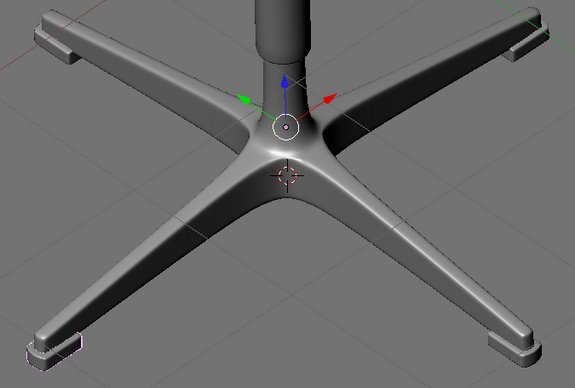
The issue should now be solved.
::现在应该解决这个问题了.
|
| Much better |
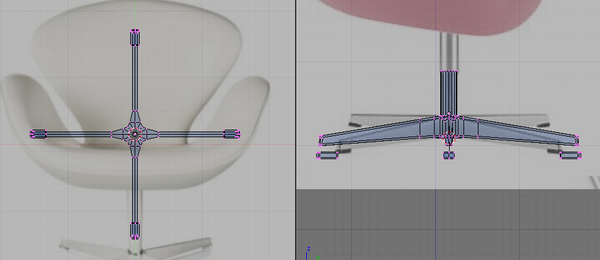
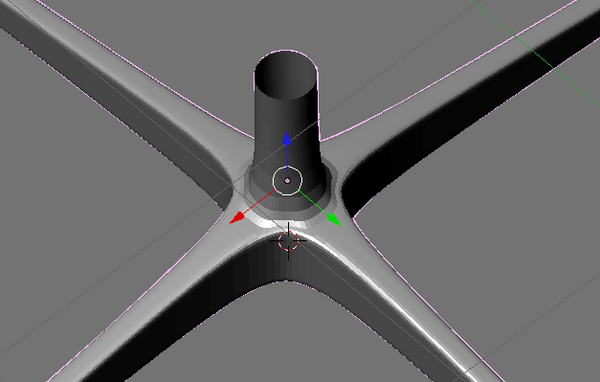
This is how the whole leg assembly should look. All have subsurf modifier on.
::整个腿组合应该是这样的.
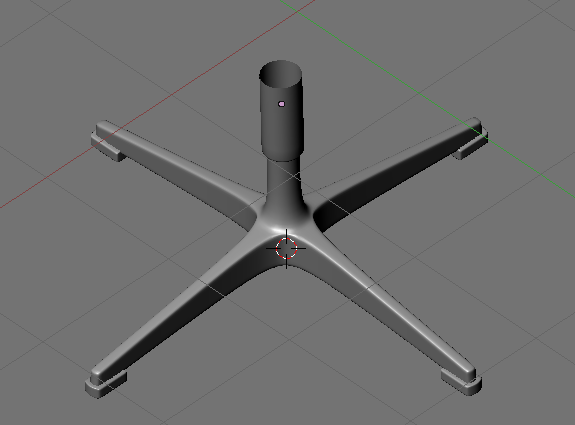
|
| Leg assembly |
There is still an issue though. This is not important in most part but will be taken care of for this time.
::虽然还有一个问题. 这在大部分情况下并不重要,
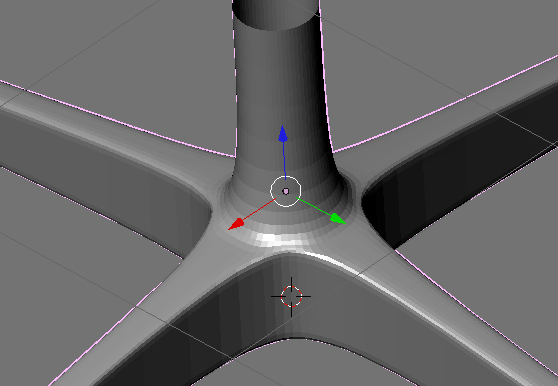
When one of the leg stops is selected in object mode, it would show that its center is not at the center of the mesh. The center is where the gizzmo (the red, blue and green arrow) would be located.
::当在对象模式中选择一个脚停时,它会显示它的中心不在网格的中心.中心是吉兹莫 (红色,蓝色和绿色箭头) 的位置.
|
| object center not at the center of the mesh |
To correct this select the offending object. Click the Mesh menu (located at the header) and navigate to "Transform" and select "Center New" from the options. Blender would automatically calculate the new center based on the objects mesh. Now when the object is selected, the center would be located at a mush more appropriate location.
::为了纠正此问题,选择有问题的对象.点击Mesh菜单 (位于头部),然后导航到"转换"并从选项中选择"新中心".Blender将根据对象的网格自动计算新的中心.现在当对象被选择时,中心将位于更合适的位置.
|
| Center at proper place |
Do the same to the other stoppers.
::其他塞也一样.
Now if you haven't named each individual part yet, You can do it now. Name each part sensible names like uppertelescope, lowertelescope, etc.
::现在,如果你还没有给每个单独的部分命名,你可以现在做.给每个部分命名有意义的名称,如上望远镜,下望远镜等.
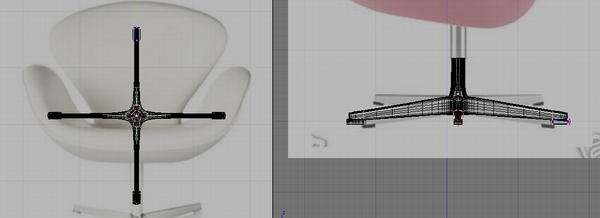
The Whole Chair
::整个主席
Unhide or Show the layer where your chair seat is so that it would unite with the legs. Now this is how the whole model should look like.
::让椅子的座位与脚相连. 整个模型应该是这样的.
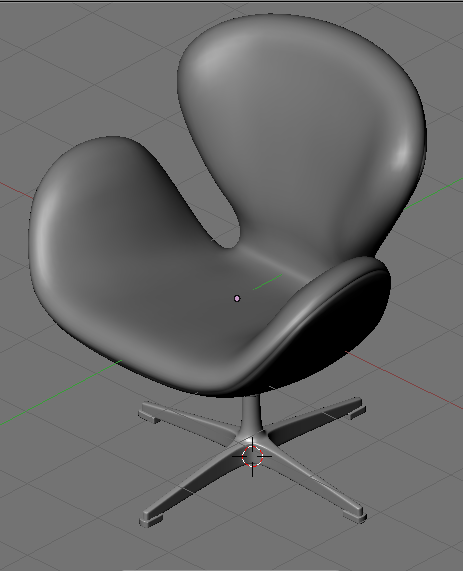
|
| Finished Model |