OpenSCAD教程
Scaling parts or the whole model
::缩放部分或整个模型
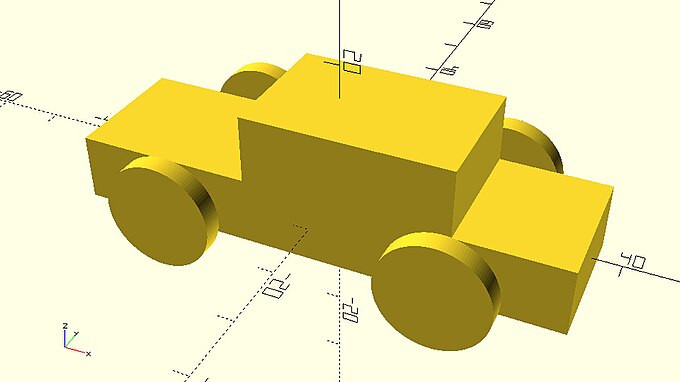
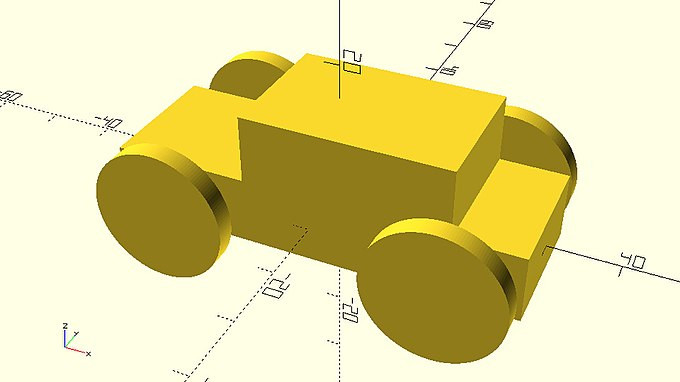
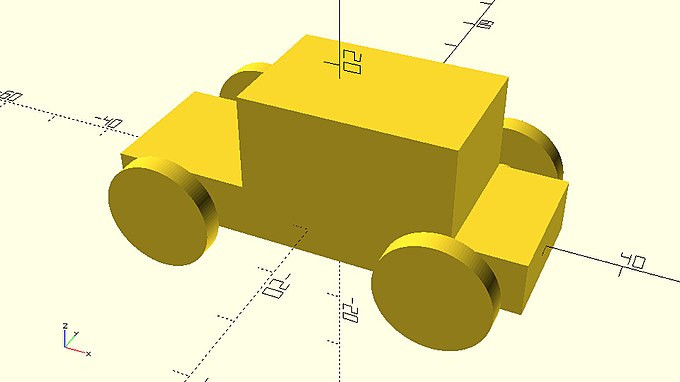
The model you created in the previous chapter was a great starting point for working with OpenSCAD, but perhaps after seeing it you recognized some aspects which should be changed. Here we will discuss strategies for modifying components of designs. One way to do so is by using the scale command, which is another one of the transformation commands. Modify the statement that creates the base of the car’s body in the following way in order to increase the length of the body by a ratio of 1.2.
::你在上一章中创建的模型是使用OpenSCAD工作的很好的起点,但也许在看过之后你认识到一些应该改变的方面.在这里我们将讨论修改设计组件的策略.这样做的方法之一是使用缩放命令,这是另一个转换命令. 修改创建汽车车身的底部的语句以以下方式,以便将车身的长度增加1.2的比率.
|
car_with_lengthened_body_base.scad
…
// Car body base
scale([1.2,1,1])
    cube([60,20,10],center=true);
…
|
You should notice that the scale command is used like the transform and rotate commands. It is added to the left of an existing statement without including a semicolon in between and it has a vector of three values as an input parameter. In analogy to the translate and rotate commands each value corresponds to the scaling ratio along the X, Y and Z axis.
::您应该注意到,scale命令和转换和旋转命令一样使用.它被添加到现有语句的左边,而没有包括半角点在中间,并且它具有三个值的向量作为输入参数.与翻译和旋转命令相比,每个值对应于沿X,Y和Z轴的缩放比.
| Try modifying the input of the scale command in order to scale the base of the body by a factor of 1.2 along the X axis and a factor of 0.1 or 2 along the Y axis. Did you get anything that could be a Mars rover or a tank? Are you surprised with how different the models look compared to the original car? |

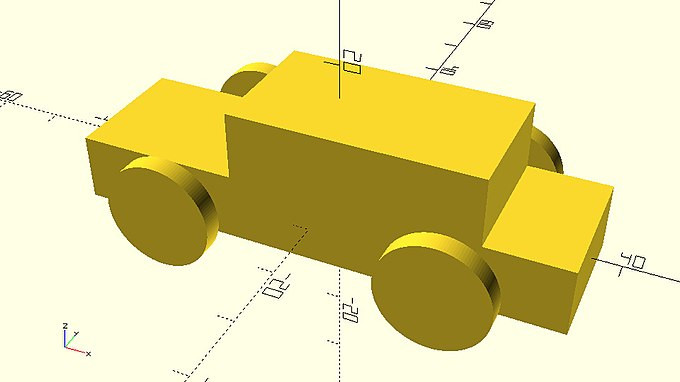
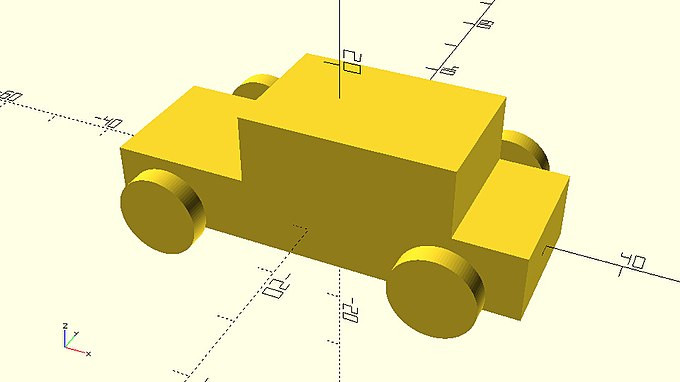
It is also possible to apply the same scale command or any other transformation command to more than one objects. Use the following code to apply the scale command to both the base and the top of the car’s body.
::也可以将相同的缩放命令或任何其他转换命令应用于多个对象.使用以下代码将缩放命令应用于车身的底部和顶部.
|
car_with_lengthened_body.scad
scale([1.2,1,1]) {
    // Car body base
    cube([60,20,10],center=true);
    // Car body top
    translate([5,0,10 - 0.001])
        cube([30,20,10],center=true);
}
|
The first thing you should notice is that in order to apply the scale command to more than one object, a set of curly brackets is used. The statements that define the corresponding objects along with their semicolons are placed inside the curly brackets. The curly brackets don’t require a semicolon at the end.
::首先你应该注意到的是,为了将尺度命令应用于多个对象,使用一组卷曲括号.定义对应对象的语句及其分号都放置在卷曲括号内.卷曲括号不需要在末尾加分号.
The second thing you should notice is how the use of white space and comments increase the readability of your script. The following script is exactly equivalent, you can decide for yourself which one you’d rather have to read.
::您应该注意到的第二件事是白色空间和评论的使用如何提高您的脚本的可读性.下面的脚本完全相当,您可以自己决定哪一个您更愿意阅读.
scale([1.2,1,1]) {
    cube([60,20,10],center=true);
    translate([5,0,10 - 0.001])
        cube([30,20,10],center=true);
}
|
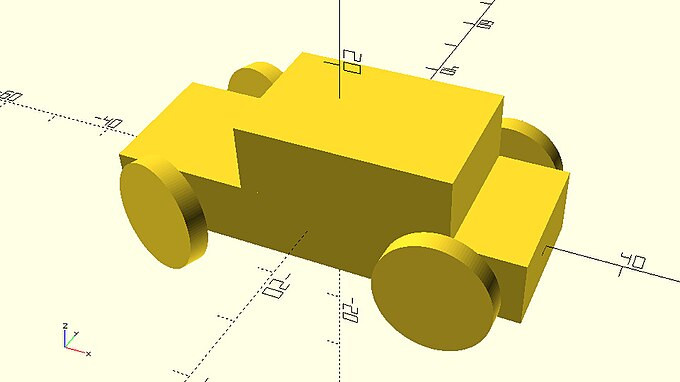
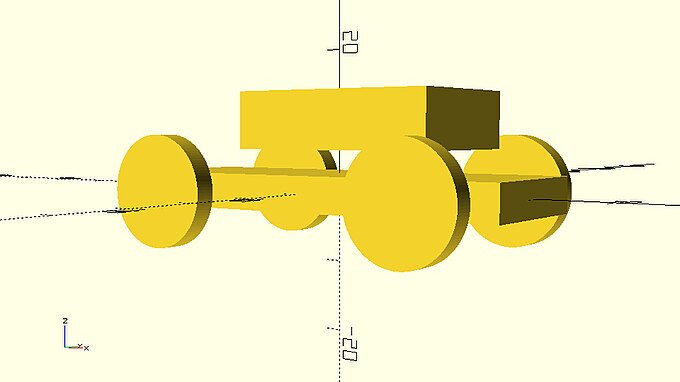
| Try applying the scale command to your whole model. Did you remember to include all statements inside the curly brackets? What should be the relation between the scaling factors along the X and Z axis so that the wheels don’t deform? What should the scaling factors be to get a car that has the same proportions but double the size? |
-
For the wheels not to deform, the scaling factors along the X and Z axis should be equal.
::为了防止轮子变形,X轴和Z轴上的缩放因子应该是相同的.
|
scaled_car.scad
$fa = 1;
$fs = 0.4;
scale([2,2,2]) {
    // Car body base
    cube([60,20,10],center=true);
    // Car body top
    translate([5,0,10 - 0.001])
        cube([30,20,10],center=true);
    // Front left wheel
    translate([-20,-15,0])
        rotate([90,0,0])
        cylinder(h=3,r=8,center=true);
    // Front right wheel
    translate([-20,15,0])
        rotate([90,0,0])
        cylinder(h=3,r=8,center=true);
    // Rear left wheel
    translate([20,-15,0])
        rotate([90,0,0])
        cylinder(h=3,r=8,center=true);
    // Rear right wheel
    translate([20,15,0])
        rotate([90,0,0])
        cylinder(h=3,r=8,center=true);
    // Front axle
    translate([-20,0,0])
        rotate([90,0,0])
        cylinder(h=30,r=2,center=true);
    // Rear axle
    translate([20,0,0])
        rotate([90,0,0])
        cylinder(h=30,r=2,center=true);
}
|

Quick quiz
::快速测试
The following script is the model you created in the first chapter.
::下面的脚本是你在第一章中创建的模型.
$fa = 1;
$fs = 0.4;
// Car body base
cube([60,20,10],center=true);
// Car body top
translate([5,0,10 - 0.001])
    cube([30,20,10],center=true);
// Front left wheel
translate([-20,-15,0])
    rotate([90,0,0])
    cylinder(h=3,r=8,center=true);
// Front right wheel
translate([-20,15,0])
    rotate([90,0,0])
    cylinder(h=3,r=8,center=true);
// Rear left wheel
translate([20,-15,0])
    rotate([90,0,0])
    cylinder(h=3,r=8,center=true);
// Rear right wheel
translate([20,15,0])
    rotate([90,0,0])
    cylinder(h=3,r=8,center=true);
// Front axle
translate([-20,0,0])
    rotate([90,0,0])
    cylinder(h=30,r=2,center=true);
// Rear axle
translate([20,0,0])
    rotate([90,0,0])
    cylinder(h=30,r=2,center=true);
|
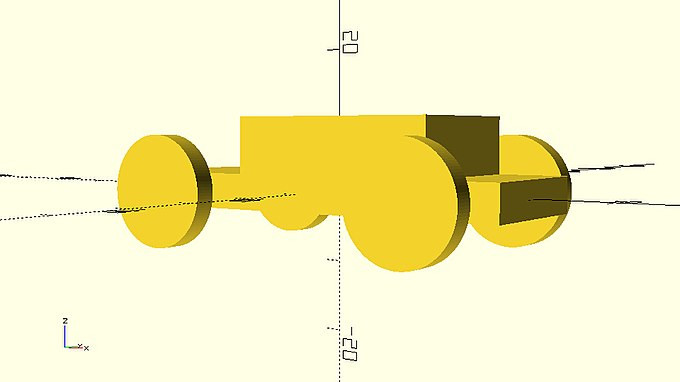
| Try rotating the front wheels by 20 degrees around the Z axis, as if the car was making a right turn. In order to make your model more convincing, try rotating the body of the car (base and top) by 5 degrees around the X axis in the opposite direction of the turn. To turn the wheels, modify the input parameters of existing rotate commands, to turn the body add a new rotate command. |
|
turning_car.scad
$fa = 1;
$fs = 0.4;
rotate([5,0,0]) {
    // Car body base
    cube([60,20,10],center=true);
    // Car body top
    translate([5,0,10 - 0.001])
        cube([30,20,10],center=true);
}
// Front left wheel
translate([-20,-15,0])
    rotate([90,0,-20])
    cylinder(h=3,r=8,center=true);
// Front right wheel
translate([-20,15,0])
    rotate([90,0,-20])
    cylinder(h=3,r=8,center=true);
// Rear left wheel
translate([20,-15,0])
    rotate([90,0,0])
    cylinder(h=3,r=8,center=true);
// Rear right wheel
translate([20,15,0])
    rotate([90,0,0])
    cylinder(h=3,r=8,center=true);
// Front axle
translate([-20,0,0])
    rotate([90,0,0])
    cylinder(h=30,r=2,center=true);
// Rear axle
translate([20,0,0])
    rotate([90,0,0])
    cylinder(h=30,r=2,center=true);
|
Parameterizing parts of your model
::参数化模型的部分
You should have gotten the point that a model is most of the times not intended to exist in one version. One of the powers of OpenSCAD scripting language lies in making easy the ability to reuse models over and over again or simply to play around with them until you are satisfied to commit to a final version. It’s time to make some modifications to your car!
::你应该明白,一个模型通常不是在一个版本中存在的.OpenSCAD脚本语言的一个力量在于使模型一次又一次地重复使用或简单地与它们玩,直到你满足于最终版本.现在是时候对你的汽车进行一些修改了!
| Try changing the radius of the wheels to 10 units. How easily did you find which values to modify? Did you have to do the same thing four times? |
|
car_with_larger_wheels.scad
// Front left wheel
translate([-20,-15,0])
    rotate([90,0,0])
    cylinder(h=3,r=10,center=true);
// Front right wheel
translate([-20,15,0])
    rotate([90,0,0])
    cylinder(h=3,r=10,center=true);
// Rear left wheel
translate([20,-15,0])
    rotate([90,0,0])
    cylinder(h=3,r=10,center=true);
// Rear right wheel
translate([20,15,0])
    rotate([90,0,0])
    cylinder(h=3,r=10,center=true);
|
Although it wasn’t that hard to change the size of wheels it could have been much simpler. First, it could have been easier to find which values to change. Second, you could have only one value to change since all wheels have the same radius. All this can be achieved with the use of variables. In the following script a variable for the radius of the wheels is introduced.
::虽然改变轮子的大小并不难,但它可以更简单.首先,更容易找到要改变的值.其次,由于所有轮子的半径相同,您只能有一个值进行更改.所有这些都可以通过使用变量实现.在下面的脚本中,引入了轮子半径的变量.
wheel_radius = 8;
// Front left wheel
translate([-20,-15,0])
    rotate([90,0,0])
    cylinder(h=3,r=wheel_radius,center=true);
// Front right wheel
translate([-20,15,0])
    rotate([90,0,0])
    cylinder(h=3,r=wheel_radius,center=true);
// Rear left wheel
translate([20,-15,0])
    rotate([90,0,0])
    cylinder(h=3,r=wheel_radius,center=true);
// Rear right wheel
translate([20,15,0])
    rotate([90,0,0])
    cylinder(h=3,r=wheel_radius,center=true);
|
Every variable has two parts: a name and a value. In this example, the variable name is "wheel_radius". A valid variable name uses only alphanumeric characters and underscores (A-Z, a-z, 0-9, and _). After the variable name, an equals sign separates the name from the value, and is followed by the value itself. Finally, a semicolon is required at the end to denote the completion of that statement. It’s a good practice to keep your variables organized by defining them all at the top of the document.
::每个变量都有两个部分:一个名称和一个值.在这个例子中,变量名是"wheel_radius".一个有效的变量名只使用字母和数字字符和下划线 (A-Z,a-z,0-9,和_).在变量名之后,一个等号将名称与值分开,然后是值本身.最后,在最后需要一个半点柱来表示该语句的完成.通过在文档顶部定义它们来组织您的变量是很好的做法.
Once a variable is defined, it can be used in the code to represent its value. In this example, the cylinder commands have been modified to use the wheel_radius variable for the input parameter r. When OpenSCAD evaluates this script, it will set the input parameter r equal to the value of the wheel_radius variable.
::一旦定义了一个变量,它可以在代码中用来表示它的值.在这个例子中,圆柱体命令已被修改为使用 wheel_radius 变量作为输入参数 r.当 OpenSCAD 评估这个脚本时,它将设置输入参数 r 等于 wheel_radius 变量的值.
| Try using a variable named wheel_radius to define the size of your car’s wheels. Try changing the size of the wheels a few times by modifying the value of the wheel_radius variable. How much easier did you find changing the size of the wheels using the wheel_radius variable? |
|
car_with_smaller_wheels.scad
$fa = 1;
$fs = 0.4;
wheel_radius = 6;
// Car body base
cube([60,20,10],center=true);
// Car body top
translate([5,0,10 - 0.001])
    cube([30,20,10],center=true);
// Front left wheel
translate([-20,-15,0])
    rotate([90,0,0])
    cylinder(h=3,r=wheel_radius,center=true);
// Front right wheel
translate([-20,15,0])
    rotate([90,0,0])
    cylinder(h=3,r=wheel_radius,center=true);
// Rear left wheel
translate([20,-15,0])
    rotate([90,0,0])
    cylinder(h=3,r=wheel_radius,center=true);
// Rear right wheel
translate([20,15,0])
    rotate([90,0,0])
    cylinder(h=3,r=wheel_radius,center=true);
// Front axle
translate([-20,0,0])
    rotate([90,0,0])
    cylinder(h=30,r=2,center=true);
// Rear axle
translate([20,0,0])
    rotate([90,0,0])
    cylinder(h=30,r=2,center=true);
|
There is one important thing you should keep in mind about the behavior of variables in OpenSCAD. The variables in OpenSCAD behave like constants. They can hold only one value which they keep throughout the creation of your model. So, what happens if you assign a value to wheel_radius at the start of your script and then assign a new value to it after the definition of the two front wheels? Will the rear wheels have different size compared to the front wheels?
::关于OpenSCAD中的变量行为,你应该记住一个重要的事情. OpenSCAD中的变量行为像常数.它们只能保留一个值,它们在整个模型创建过程中都保留.所以,如果在脚本开始时赋予wheel_radius一个值,然后在定义前两轮后赋予它一个新的值,会发生什么?后轮与前轮的尺寸会不同吗?
| Try assigning a different value to the wheel_radius variable right after the definition of the front wheels. Does your car have different front and rear wheel size? |
|
car_with_same_sized_wheels.scad
$fa = 1;
$fs = 0.4;
wheel_radius = 6;
// Car body base
cube([60,20,10],center=true);
// Car body top
translate([5,0,10 - 0.001])
    cube([30,20,10],center=true);
// Front left wheel
translate([-20,-15,0])
    rotate([90,0,0])
    cylinder(h=3,r=wheel_radius,center=true);
// Front right wheel
translate([-20,15,0])
    rotate([90,0,0])
    cylinder(h=3,r=wheel_radius,center=true);
wheel_radius = 12;
// Rear left wheel
translate([20,-15,0])
    rotate([90,0,0])
    cylinder(h=3,r=wheel_radius,center=true);
// Rear right wheel
translate([20,15,0])
    rotate([90,0,0])
    cylinder(h=3,r=wheel_radius,center=true);
// Front axle
translate([-20,0,0])
    rotate([90,0,0])
    cylinder(h=30,r=2,center=true);
// Rear axle
translate([20,0,0])
    rotate([90,0,0])
    cylinder(h=30,r=2,center=true);
|

You should notice that all wheels have the same size. If multiple assignments to a variable exist, OpenSCAD uses the value of the last assignment. Even statements that make use of this variable and are defined before the last value assignment, will use the value of the last assignment.
::您应该注意到所有的轮子都有相同的大小.如果一个变量存在多个赋值,OpenSCAD会使用最后一个赋值的值.即使使用这个变量并且在最后一个值赋值之前定义的语句,也会使用最后一个值赋值.
OpenSCAD will also give a warning in this case:
WARNING: wheel_radius was assigned on line 3 but was overwritten on line 17
::在这种情况下,OpenSCAD也会发出警告:警告: wheel_radius 在 3 行被赋值,但在 17 行被覆盖
| A variable assignment within { curly braces } only applies within those braces. Duplicate assignments at different levels of brace enclosure are not considered to conflict. |
Parameterizing more parts of your model
::参数化模型的更多部分
You can now easily play around with the size of the wheels. It would be nice if you were able to customize more aspects of your model with such ease. You should notice for a moment that modifying the size of the wheels doesn’t affect any other aspect of your model, it doesn’t break your model in any way. This is not always the case.
::现在你可以轻松地玩弄轮子的大小. 如果你能够轻松地定制你的模型的更多方面,那就很好了. 你应该注意到一下,改变轮子的大小不会影响你的模型的任何其他方面,它不会以任何方式破坏你的模型. 这并不总是如此.
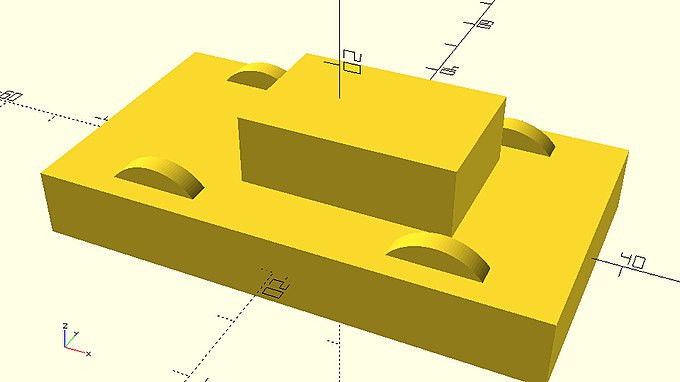
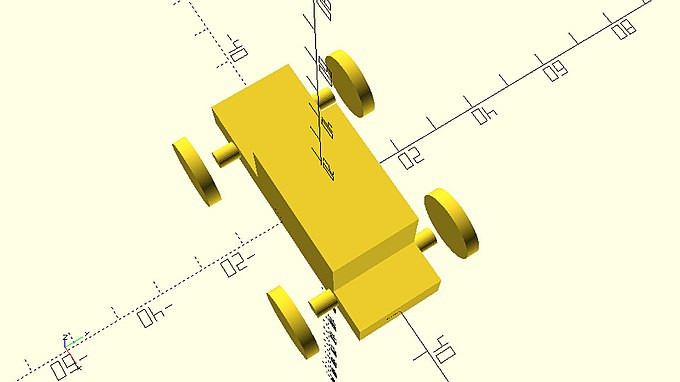
| Try modifying the height of the car’s body base and top by defining a base_height and a top_height variable and making the appropriate changes to the corresponding statements that define the base and the top. Assign the value 5 to the base_height variable and the value 8 to the top_height variable. What do you notice? |
|
car_with_floating_body_top.scad
base_height = 5;
top_height = 8;
// Car body base
cube([60,20,base_height],center=true);
// Car body top
translate([5,0,10 - 0.001])
    cube([30,20,top_height],center=true);
|
It is obvious that the body of the car stops being one as the base and the top separate. This happened because the correct position of the body’s top is dependent on the height of the body’s base and the height of body’s top. Remember that in order to make the top sit on top of the base you had to translate the top along the Z axis by an amount equal to half the height of the base plus half the height of the top. If you want to parameterize the height of the base and the top you should also parameterize the translation of the top along the Z axis.
::很明显,车身不再是底部和顶部分开的东西.这是因为车身顶部的正确位置取决于车身底部和车身顶部的高度.请记住,为了使顶部坐在底部上方,您必须将顶部沿Z轴转换成等于底部高度的一半加上顶部高度的一半的数量.如果您想参数化底部和顶部的高度,则也应该参数化顶部沿Z轴的转换.
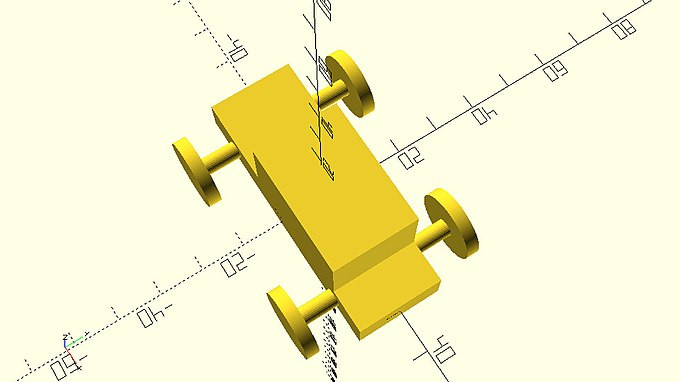
| Try parameterizing the translation of the body’s top along the Z axis using the base_height and top_height variables to make it sit on top of the body’s base. Try assigning different values to the base_height and top_height variables. Does the position of the body’s top remain correct? |
|
car_with_properly_attached_body_top.scad
base_height = 5;
top_height = 8;
wheel_radius = 8;
// Car body base
cube([60,20,base_height],center=true);
// Car body top
translate([5,0,base_height/2+top_height/2 - 0.001])
    cube([30,20,top_height],center=true);
|
|
car_with_higher_body.scad
base_height = 8; top_height = 14; |
You should remember that every time you parameterize some aspect of your model you should also parameterize additional dependent aspects to prevent your model from breaking apart.
::您应该记住,每次参数化模型的某个方面, 您也应该参数化其他依赖的方面, 以防止模型破裂.
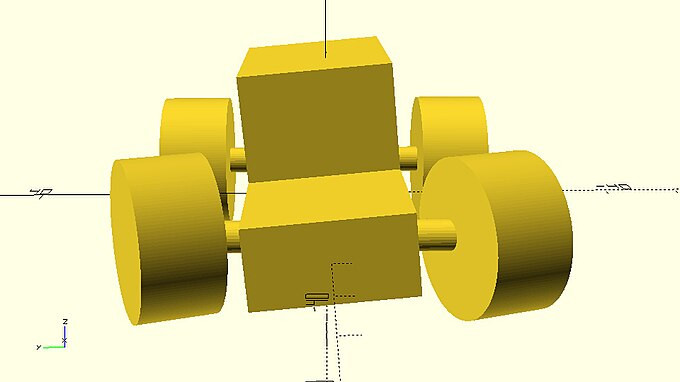
| Try parameterizing the track (separation between left and right wheels) using a new variable named track. Try assigning different values to the track variable. What do you notice? Does any other aspect of your model depend on the value of the track variable? If yes, use the track variable to parameterize it so your model doesn’t break apart. |
|
car_with_unattached_wheels.scad
track = 40;
// Front left wheel
translate([-20,-track/2,0])
    rotate([90,0,0])
    cylinder(h=3,r=wheel_radius,center=true);
// Front right wheel
translate([-20,track/2,0])
    rotate([90,0,0])
    cylinder(h=3,r=wheel_radius,center=true);
// Rear left wheel
translate([20,-track/2,0])
    rotate([90,0,0])
    cylinder(h=3,r=wheel_radius,center=true);
// Rear right wheel
translate([20,track/2,0])
    rotate([90,0,0])
    cylinder(h=3,r=wheel_radius,center=true);
|
|
car_with_properly_attached_wheels.scad
track = 40;
// Front left wheel
translate([-20,-track/2,0])
    rotate([90,0,0])
    cylinder(h=3,r=wheel_radius,center=true);
// Front right wheel
translate([-20,track/2,0])
    rotate([90,0,0])
    cylinder(h=3,r=wheel_radius,center=true);
// Rear left wheel
translate([20,-track/2,0])
    rotate([90,0,0])
    cylinder(h=3,r=wheel_radius,center=true);
// Rear right wheel
translate([20,track/2,0])
    rotate([90,0,0])
    cylinder(h=3,r=wheel_radius,center=true);
// Front axle
translate([-20,0,0])
    rotate([90,0,0])
    cylinder(h=track,r=2,center=true);
// Rear axle
translate([20,0,0])
    rotate([90,0,0])
    cylinder(h=track,r=2,center=true);
|
Challenge
::挑战
The following script corresponds to the car model with parameterized wheel radius, base height, top height and track.
::下面的脚本对应于车型,其中参数为轮半径,底部高度,顶部高度和轨道.
|
car_from_parameterized_script.scad
$fa = 1;
$fs = 0.4;
wheel_radius = 8;
base_height = 10;
top_height = 10;
track = 30;
// Car body base
cube([60,20,base_height],center=true);
// Car body top
translate([5,0,base_height/2+top_height/2 - 0.001])
    cube([30,20,top_height],center=true);
// Front left wheel
translate([-20,-track/2,0])
    rotate([90,0,0])
    cylinder(h=3,r=wheel_radius,center=true);
// Front right wheel
translate([-20,track/2,0])
    rotate([90,0,0])
    cylinder(h=3,r=wheel_radius,center=true);
// Rear left wheel
translate([20,-track/2,0])
    rotate([90,0,0])
    cylinder(h=3,r=wheel_radius,center=true);
// Rear right wheel
translate([20,track/2,0])
    rotate([90,0,0])
    cylinder(h=3,r=wheel_radius,center=true);
// Front axle
translate([-20,0,0])
    rotate([90,0,0])
    cylinder(h=track,r=2,center=true);
// Rear axle
translate([20,0,0])
    rotate([90,0,0])
    cylinder(h=track,r=2,center=true);
|

| Try using a wheel_width variable to parameterize the width of the wheels, a wheels_turn variable to parameterize the rotation of the front wheels around the Z axis and a body_roll variable to parameterize the rotation of the body around the X axis. Experiment with assigning different values to wheel_radius, base_height, top_height, track, wheel_width, wheels_turn and body_roll to create a version of the car that you like. |
|
turning_car_from_parameterized_script.scad
$fa = 1;
$fs = 0.4;
wheel_radius = 10;
base_height = 10;
top_height = 14;
track = 40;
wheel_width = 10;
body_roll = -5;
wheels_turn = 20;
rotate([body_roll,0,0]) {
    // Car body base
    cube([60,20,base_height],center=true);
    // Car body top
    translate([5,0,base_height/2+top_height/2 - 0.001])
        cube([30,20,top_height],center=true);
}
// Front left wheel
translate([-20,-track/2,0])
    rotate([90,0,wheels_turn])
    cylinder(h=wheel_width,r=wheel_radius,center=true);
// Front right wheel
translate([-20,track/2,0])
    rotate([90,0,wheels_turn])
    cylinder(h=wheel_width,r=wheel_radius,center=true);
// Rear left wheel
translate([20,-track/2,0])
    rotate([90,0,0])
    cylinder(h=wheel_width,r=wheel_radius,center=true);
// Rear right wheel
translate([20,track/2,0])
    rotate([90,0,0])
    cylinder(h=wheel_width,r=wheel_radius,center=true);
// Front axle
translate([-20,0,0])
    rotate([90,0,0])
    cylinder(h=track,r=2,center=true);
// Rear axle
translate([20,0,0])
    rotate([90,0,0])
    cylinder(h=track,r=2,center=true);
|
By now it should be clear to you that parameterizing your models unlocks the power of reusing, customizing and iterating your designs as well as that of effortlessly exploring different possibilities.
::现在你应该明白, 参数化模型可以释放重复使用,定制和代设计的力量,
Parameterizing your own models
::参数化您自己的模型
Have you put your new skills into use? Have you created any other models yourself?
::你是否已经使用了这些新技能?
| Try parameterizing a few aspects or more of the models that you have created. See how far you can go! Experiment with assigning various combinations of values to the variables that you have defined. See how different the versions of your designs can be. |