LaTeX
LaTeX 可以用于创建演示文稿。这个任务有多个包可以实现,如 Powerdot、Prosper、Seminar 等,但 Beamer 包是最广泛使用的。
需要注意的是,LaTeX 生成的演示文稿是 PDF 格式,可以通过一些 PDF 阅读器(例如 Okular、Evince 或 Adobe Reader)以全屏模式查看。如果你想在演示文稿中进行导航,可以使用几乎看不见的链接,这些链接位于右下角,而不会离开全屏模式。
Beamer 包
Beamer 包已随大多数 LaTeX 发行版提供,但也可以从 CTAN 获取。如果你使用 MikTeX,只需包含 Beamer 包,并让 LaTeX 自动下载所需的所有包。文档详细解释了其功能。你还可以查看 PracTex 文章《Beamer by Example》[1]。
Beamer 包还加载了许多有用的包,包括 xcolors、hyperref 等。以下是一个介绍性示例及其输出。
\documentclass[10pt]{beamer}
% 在此处添加额外的包
\title{Presentation on XXX topic}
\author{AAA}
\begin{document}
   \maketitle
	\begin{frame}
		\frametitle{This is the first slide}
		Here you can put any text/equation etc.
		$a^2 + b^2 = c^2$.
	\end{frame}
	\begin{frame}
		\frametitle{This is the second slide}
		\framesubtitle{A bit more information about this}
		Some random text.
	\end{frame}
\end{document}
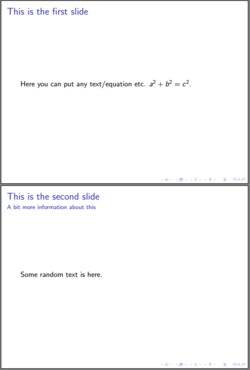
简单的 Beamer 演示示例
在上述代码中,Beamer 包通过 \documentclass{beamer} 命令在文档头部加载。然后可以指定常规的头部信息。在 Beamer 演示文稿中,"frame" 是与 MS Office 中的 "slide" 等价的术语。一个 frame 使用环境 \begin{frame} ...... \end{frame} 定义。\frametitle{} 命令指定每个幻灯片的标题。frame 标题和副标题也可以与环境一起传递,如下所示:
\begin{frame}{Title of frame}{subtitle of frame}
...
\end{frame}
可以使用常规的环境(如 itemize、enumerate、equation 等)。在 frame 内部,可以使用如 block、theorem、proof 等环境。此外,\maketitle 可以用来创建标题页,如果标题和作者已经设置。
标题页和作者信息
标题页是第一张页面,可以插入以下信息:
-
标题和副标题(可选)——使用
\title和\subtitle命令,或使用\title[short title (optional)]{Long title}{subtitle (optional)}。 -
作者姓名——使用
\author{}命令。 -
机构名称——使用
\institute命令。注意使用\inst{1}和\inst{2}命令将作者与其各自的机构关联起来。 -
演讲日期和地点——可以使用
\date[short date(optional)]{Long date}命令插入。 -
机构徽标等。
需要注意的是,方括号中的信息(即 [ ])是可选的。
\documentclass{beamer}
\title[Crisis] {The Economics of Financial Crisis}{Evidence from India}
\author[Author, Anders] {F.~Author\inst{1} \and S.~Anders\inst{2}}
\institute[Universities Here and There] {
    \inst{1} Institute of Computer Science\newline  University Here
    \and
    \inst{2} Institute of Theoretical Philosophy\newline University There}
\date[KPT 2004] {Conference on Presentation Techniques, 2004}
\subject{Computer Science}

\begin{document}
     \maketitle
      % place your frames here.
\end{document}

简单 Beamer 类的标题页(无主题类型或主题颜色)
在文档中包括 \maketitle 命令(如上面的代码)是非常重要的,这样才能创建标题页。\maketitle 和 \titlepage 命令是等效的。
目录
目录页会显示当前章节,并以突出显示的方式呈现:
\begin{frame}
\frametitle{Table of Contents}
\tableofcontents[currentsection]
\end{frame}
可以通过在导言部分使用以下代码,在每个章节开始时自动生成目录:
\AtBeginSection[]
{
  \begin{frame}
    \frametitle{Table of Contents}
    \tableofcontents[currentsection]
  \end{frame}
}
对于小节,也可以使用类似的方式:
\AtBeginSubsection[]
{
  \begin{frame}
    \frametitle{Table of Contents}
    \tableofcontents[currentsection,currentsubsection]
  \end{frame}
}
节和小节
与所有其他 LaTeX 文件一样,可以使用以下命令对文档进行结构化:
\section[Section]{My section}
\subsection[Subsection]{My subsection}
\subsubsection[Subsubsection]{My subsubsection}
这些命令必须放在 frame 之前和之间。它们将修改带有方括号中参数的目录。可选参数将在幻灯片的标题导航中显示,具体取决于所使用的主题。你可以使用 \sectionpage 宏为声明的章节生成一个分隔幻灯片,例如:
\begin{frame}\sectionpage\end{frame}
参考文献(Beamer)
以下示例显示了一个手动制作的参考文献幻灯片,包含两个条目:
\begin{frame}[allowframebreaks]
  \frametitle<presentation>{Further Reading}
  \begin{thebibliography}{10}
  \beamertemplatebookbibitems
  \bibitem{Autor1990}
    A.~Autor.
    \newblock {\em Introduction to Giving Presentations}.
    \newblock Klein-Verlag, 1990.
  \beamertemplatearticlebibitems
  \bibitem{Jemand2000}
    S.~Jemand.
    \newblock On this and that.
    \newblock {\em Journal of This and That}, 2(1):50--100, 2000.
  \end{thebibliography}
\end{frame}
随着参考文献列表的增加,参考文献幻灯片将分成两页,以此类推,使用 allowframebreaks 选项。可以通过在相关的 bibitem 语句中添加“可选”标签来引用单个条目。引用命令为 \cite。Beamer 还支持有限的自定义参考文献的显示方式(请参见手册)。
不同类型的引用工作通过一个小符号来表示(例如书籍、文章等)。该符号通过 beamertemplatebookbibitems 和 beamertemplatearticlebibitems 命令设置。还可以直接使用 setbeamertemplate,例如:
\begin{frame}[allowframebreaks]
  \frametitle<presentation>{Further Reading}
  \begin{thebibliography}{10}
  \setbeamertemplate{bibliography item}[book]
  \bibitem{Autor1990}
    A.~Autor.
    \newblock {\em Introduction to Giving Presentations}.
    \newblock Klein-Verlag, 1990.
  \setbeamertemplate{bibliography item}[article]
  \bibitem{Jemand2000}
    S.~Jemand.
    \newblock On this and that.
    \newblock {\em Journal of This and That}, 2(1):50--100, 2000.
  \end{thebibliography}
\end{frame}
除了书籍和文章外,还有其他可能的参考文献条目类型,如 online、triangle 和 text。还可以通过包含图形来定义用户自定义的参考文献条目。
如果想将完整的参考文献作为脚注显示,可以使用 biblatex 包中的 \footfullcite。例如,可以使用:
\documentclass[10pt,handout,english]{beamer}
\usepackage[english]{babel}
\usepackage[backend=biber,style=numeric-comp,sorting=none]{biblatex}
\addbibresource{biblio.bib}

\begin{frame}
 \frametitle{Title}
 A reference~\footfullcite{ref_bib}, with ref_bib an item of the .bib file.
\end{frame}
主题
Beamer 提供了两种定义主题的方法:1)使用内置主题,2)使用用户定义的主题。
内置解决方案
Beamer 有几个内置主题,可以通过在导言部分指定其“名称”和“颜色”来使用。下表包含了 Beamer 附带的各种主题和颜色组合。有关更多自定义选项,请查看你所使用的 Beamer 发行版中包含的官方文档,特别是“更改外观”部分。
\usetheme{Warsaw}
\usecolortheme{beaver}
主题的完整列表如下:
-
AnnArbor
-
Antibes
-
Bergen
-
Berkeley
-
Berlin
-
CambridgeUS
-
Copenhagen
-
Darmstadt
-
Dresden
-
Frankfurt
-
Goettingen
-
Hannover
-
Ilmenau
-
JuanLesPins
-
Luebeck
-
Madrid
-
Malmoe
-
Marburg
-
Montpellier
-
PaloAlto
-
Pittsburgh
-
Rochester
-
Singapore
-
Szeged
-
Warsaw
-
boxes
-
default
-
default
-
albatross
-
beaver
-
beetle
-
crane
-
dolphin
-
dove
-
fly
-
lily
-
orchid
-
rose
-
seagull
-
seahorse
-
whale
-
wolverine
用户定义的主题
首先,你可以指定 outertheme,它定义了每个幻灯片的头部和底部线。
\useoutertheme{infolines}
\useinnertheme{rectangles}
以下是所有可用的外部和内部主题的列表:
| 外部主题 | 内部主题 |
|---|---|
| infolines | shadow |
| miniframes | sidebar |
| smoothbars | smoothtree |
| split | tree |
| circles | |
| rounded |
你可以定义每个元素的颜色:
\setbeamercolor{alerted text}{fg=orange}
\setbeamercolor{background canvas}{bg=white}
\setbeamercolor{block body alerted}{bg=normal text.bg!90!black}
\setbeamercolor{block body}{bg=normal text.bg!90!black}
\setbeamercolor{block body example}{bg=normal text.bg!90!black}
\setbeamercolor{block title alerted}{use={normal text,alerted text},fg=alerted text.fg!75!normal text.fg,bg=normal text.bg!75!black}
\setbeamercolor{block title}{bg=blue}
\setbeamercolor{block title example}{use={normal text,example text},fg=example text.fg!75!normal text.fg,bg=normal text.bg!75!black}
\setbeamercolor{fine separation line}{}
\setbeamercolor{frametitle}{fg=brown}
\setbeamercolor{item projected}{fg=black}
\setbeamercolor{normal text}{bg=black,fg=yellow}
\setbeamercolor{palette sidebar primary}{use=normal text,fg=normal text.fg}
\setbeamercolor{palette sidebar quaternary}{use=structure,fg=structure.fg}
\setbeamercolor{palette sidebar secondary}{use=structure,fg=structure.fg}
\setbeamercolor{palette sidebar tertiary}{use=normal text,fg=normal text.fg}
\setbeamercolor{section in sidebar}{fg=brown}
\setbeamercolor{section in sidebar shaded}{fg=grey}
\setbeamercolor{separation line}{}
\setbeamercolor{sidebar}{bg=red}
\setbeamercolor{sidebar}{parent=palette primary}
\setbeamercolor{structure}{bg=black, fg=green}
\setbeamercolor{subsection in sidebar}{fg=brown}
\setbeamercolor{subsection in sidebar shaded}{fg=grey}
\setbeamercolor{title}{fg=brown}
\setbeamercolor{titlelike}{fg=brown}
颜色可以像往常一样定义:
\definecolor{chocolate}{RGB}{33,33,33}
块样式也可以定义:
\setbeamertemplate{blocks}[rounded][shadow=true]
\setbeamertemplate{background canvas}[vertical shading][bottom=white,top=structure.fg!25]
\setbeamertemplate{sidebar canvas left}[horizontal shading][left=white!40!black,right=black]
你还可以抑制导航符号:
\beamertemplatenavigationsymbolsempty
字体
你还可以为特定元素更改字体。如果你想让通过 \begin{frame}[plain]\titlepage\end{frame} 渲染的演示文稿标题使用衬线字体而不是默认的无衬线字体,可以使用:
\setbeamerfont{title}{family=\rmfamily}
如果你使用 Xe(La)TeX 并且使用 OpenType 字体,还可以指定增加字体大小和使用旧样式比例数字的衬线字体:
\setbeamerfont{title}{family=\rmfamily\addfontfeatures{Scale=1.18, Numbers={Lining, Proportional}}}
数学字体
Beamer 的默认设置使用与创建简单数学文章时不同的数学字体。一种快速修复方法是使用:
\usefonttheme[onlymath]{serif}
幻灯片选项
可以按如下方式传递幻灯片的选项:
\begin{frame}[option1,option2,...,option N]{Title of the frame}
% ...
\end{frame}
以下是一些有用的选项及其描述:
-
plain:此选项移除幻灯片上的所有格式,给你更多的空间来容纳较大的图像或表格。
-
shrink:如果你想在幻灯片上包含很多文字,使用
shrink选项。 -
allowframebreaks:此选项将在内容过多时自动创建新幻灯片。
-
fragile:在使用任何 verbatim 环境(如 listings)之前,应将
fragile选项传递给frame环境,因为 verbatim 环境需要以不同的方式排版。通常,fragile=singleslide是可用的(详情请参见手册)。请注意,fragile选项不能与\frame命令一起使用,因为它期望遇到一个\end{frame},并且应该单独位于一行上。
\begin{frame}[fragile]
\frametitle{Source code}

\begin{lstlisting}[caption=First C example]
int main()
{
    printf("Hello World!");
    return 0;
}
\end{lstlisting}
\end{frame}
超链接导航
Beamer 支持内部和外部超链接以帮助导航。你还可以添加清晰的按钮。
默认情况下,Beamer 类会在右下角添加导航按钮。如果要移除它们,可以在导言部分放置:
\beamertemplatenavigationsymbolsempty
动画
可以使用如 \pause、\uncover、\only 和 \itemize<a-b> 等命令使图形和文本出现或消失。文本或图形在这些命令后将显示,在以下事件后(这些事件可能会因 PDF 查看器而有所不同):按下空格键、回车键或页面下键,或使用鼠标滚动或点击下一张幻灯片按钮。每个命令的简要说明如下,更多细节请参见 Beamer 手册的第 9 章。
\pause 命令可以如下使用来提供一个暂停,即命令后的文本将在下一个事件(按钮点击/按键等)后显示:
\begin{frame}
\frametitle{Some background}
We start our discussion with some concepts.
\pause
The first concept we introduce originates with Erd\H os.
\end{frame}
\uncover 命令明确指定了显示的内容;\only 也起到相同作用,但在隐藏时不会保留空间。
\begin{frame}
\frametitle{Some background}
\only<1>{To be replaced.}
\uncover<2-3>{Only visible on slides two and three.}
\uncover<4->{Can be seen afterwards until the end.}
\end{frame}
\item 命令使用 <a-b> 来指定文本的出现和消失,其中 a 和 b 是该项显示的事件编号(包括)。例如:
\begin{itemize}
  \item This one is always shown
  \item<1-> The first time (i.e. as soon as the slide loads)
  \item<2-> The second time
  \item<1-> Also the first time
  \only<1-1> {This one is shown at the first time, but it will hide soon (on the next event after the slide loads).}
\end{itemize}
为了让每次点击揭示一个项目,可以使用以下方法:
\begin{frame}
	\frametitle{`Hidden higher-order concepts?'}
	\begin{itemize}[<+->]
	\item The truths of arithmetic which are independent of PA in some
	sense themselves `{contain} essentially {\color{blue}{hidden higher-order}},
	 or infinitary, concepts'???
	\item `Truths in the language of arithmetic which \ldots
	\item	That suggests stronger version of Isaacson's thesis.
	\end{itemize}
\end{frame}
在所有这些情况下,按下页上键、向上滚动或点击导航栏中的上一张幻灯片按钮将会回溯通过这个序列。
上述命令揭示了条目,它们只在指定的幻灯片号上或之后可见。你还可以使用 \setbeamercovered{transparent} 命令查看已揭示的条目,这些条目会以较低的不透明度显示。这意味着如果可见的文本是黑色的,那么未揭示的文本将显示为灰色。你可以使用 \setbeamercovered{invisible} 来恢复此设置。
对于文本格式化,也有类似的选项。例如,如果你想要文本采用特定的样式,可以使用 \style<3->{Text} 命令。
使用 "alert" 动画
你可以使用命令 \alert<number>{Some text},该命令将在指定的幻灯片上以相应的格式显示指定的文本。通常,它会以红色突出显示文本。以下是几个示例:
% 用户可以提供任何顺序
\begin{frame}{Test}
  \alert<1>{here comes a paragraph} \pause\\
  \alert<2>{here comes another paragraph} \pause\\
  \alert<3>{three is the magic number}
\end{frame}

% 如果警告文本按顺序出现
\begin{frame}{Test}
  \alert<+>{here comes a paragraph}\\
  \alert<+>{here comes another paragraph} \\
  \alert<+>{three is the magic number}
\end{frame}
它也可以与列表结合使用,如下所示:
\begin{frame}{Test}
  \begin{itemize}[<alert@+|+->]
  \item[] here comes a paragraph
  \item[] here comes another paragraph
  \item[] three is the magic number
  \end{itemize}
\end{frame}
以上示例来自 [1]。
同样,你可以使用 \textbf、\textit、\textsl、\textrm、\textsf、\textcolor、\structure 等命令。
对于定理、推论和证明环境也是如此。以下是一个示例:
\begin{theorem}<2->[Famous identity]
$ e^i -1 = 0$
\end{theorem}
对于表格,在放置新行(即 \\)之前,必须添加 \onslide 命令:
Test 1 & repeat & 14.5 & 656 \onslide<3-> \\
手册模式
在 Beamer 类中,默认模式是“演示模式”,用于生成幻灯片。然而,你可以通过在调用类时设置此选项,使用名为手册模式的不同模式:
\documentclass[12pt,handout]{beamer}
此模式用于每张幻灯片只显示一次,并且显示所有内容,使任何 \itemize[<+->] 环境一次性可见(例如,可打印版本)。然而,当使用 only 命令时,可能会出现问题,因为它的目的是让某些文本或图形同时可见,而不是所有的内容。
如果你想解决这个问题,可以添加一条语句,精确指定在手册模式下处理 only 命令的行为。假设你有如下代码:
\only<1>{\includegraphics{pic1}}
\only<2>{\includegraphics{pic2}}
这些图片是完全不同的,你希望它们都出现在手册中,但由于它们很大,不能放在同一张幻灯片上。解决方法是添加手册语句,如下所示:
\only<1| handout:1>{\includegraphics{pic1}}
\only<2| handout:2>{\includegraphics{pic2}}
这将确保手册为每张图片制作一张幻灯片。
现在,假设你仍然有这两张图片,并使用了 only 语句,但第二张图片显示了第一张图片以及其他一些图形,并且你不希望第一张出现在手册中。你可以通过如下方法精确指定手册模式不包括某些 only 命令:
\only<1| handout:0>{\includegraphics{pic1}}
\only<2>{\includegraphics{pic2.eps}}
该命令还可以用于隐藏幻灯片,例如:
\begin{frame}<handout:0>
或者,如果你已经写了一个幻灯片,但不再需要它,但可能稍后需要,可以写:
\begin{frame}<0| handout:0>
这将在两种模式中隐藏你的幻灯片。
关于手册模式的最后一点是关于注释的。实际上,帧的完整语法是:
\begin{frame}
...
\end{frame}
\note{...}
\note{...}
...
你可以在 note 字段中写下关于帧的注释(如果需要,可以写很多)。使用此功能,你可以添加一个选项:
\setbeameroption{show only notes}
或
\setbeameroption{show notes}
第一个选项在你进行演示时非常有用,它只显示你需要的注释,而第二个选项可以提供给那些跟随你演示的听众或错过演示的人,这样他们就可以看到幻灯片和你所说的内容。
列
columns 环境将幻灯片(垂直方向)分为多个列。示例:
\begin{frame}
    \frametitle{Example of columns 1}
    \begin{columns}[c] % "c"选项指定垂直居中对齐
    \column{.45\textwidth} % 由命令指定的列
     Contents of the first column
    \column{.45\textwidth}
     Contents split \newline into two lines
    \end{columns}
\end{frame}
\begin{frame}
     \frametitle{Example of columns 2}
     \begin{columns}[T] % 内容顶部对齐
     \begin{column}{5cm} % 每个列也可以是自己的环境
     Contents of first column \newline split into two lines
     \end{column}
     \begin{column}{5cm} % 更适合图形的顶部对齐
          \includegraphics[height=3cm]{graphic}
     \end{column}
     \end{columns}
\end{frame}
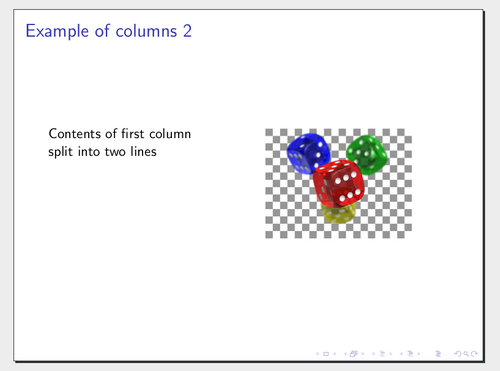
Beamer 中的列示例。
块
将文本包裹在 block 环境中会创建一个独特的、有标题的文本块(可以使用空白标题)。这可以帮助轻松区分幻灯片的不同部分。block 有三种基本类型。它们的格式取决于所使用的主题。
\begin{frame}

   \begin{block}{This is a Block}
      This is important information
   \end{block}

   \begin{alertblock}{This is an Alert block}
   This is an important alert
   \end{alertblock}

   \begin{exampleblock}{This is an Example block}
   This is an example
   \end{exampleblock}

\end{frame}
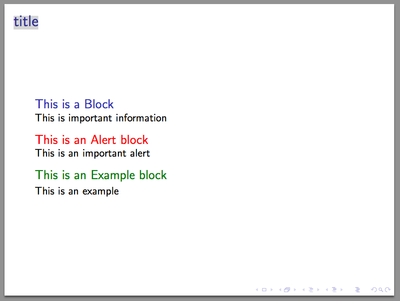
在 Beamer 演示中使用块的示例。
PDF 选项
你可以指定 PDF 的默认选项。[2]
\hypersetup{pdfstartview={Fit}} % 在第一次显示时将演示文稿适应窗口
幻灯片编号
可以使用以下代码为幻灯片添加编号:
\insertframenumber/\inserttotalframenumber
然而,这对一些演示文稿作者来说会带来两个问题:标题幻灯片被编号为第一张,附录或所谓的“备用”(即附录、预留)幻灯片被包括在总数中,尽管它们并不打算公开,直到提出“难度较大的”问题。[3] 这时,以下两个功能就派上用场了:
-
能够排除某些幻灯片不被编号。例如,可以在标题幻灯片上使用此功能来避免将其计入总数:
\begin{frame}[noframenumbering]
content...
\end{frame}
-
解决计数备用幻灯片的问题:
\documentclass[12pt,handout]{beamer}

\usetheme{CambridgeUS}
\setbeamertemplate{page number in head/foot}[appendixframenumber]

\begin{document}

\begin{frame}
content
\end{frame}

\appendix

\begin{frame}
content...
\end{frame}

\end{document}
标志
有多种方法可以插入机构的标志。以下是一些常见的情况:
-
所有幻灯片上(右下角)显示标志:
\logo{\includegraphics[width=1.5cm]{logo.jpg}}
-
只在第一张幻灯片上显示标志:
\begin{frame}
	\maketitle  % \titlepage
	\begin{tikzpicture}[overlay,remember picture]
	\node[above=0.3cm] (firstlogo) at (current page.south){\includegraphics[width=2cm]{logo}};
	\end{tikzpicture}
\end{frame}
-
在所有幻灯片的背景中显示标志
Powerdot 包
Powerdot 包是 Beamer 的一个替代品。它可以从 CTAN 获取,文档详细解释了它的功能。
通过调用 powerdot 类来加载 powerdot 包:
\documentclass{powerdot}
然后可以指定常规的头部信息。
在常规的文档环境中,多个 slide 环境指定了要放在每张幻灯片上的内容。
\begin{document}
  \begin{slide}{This is the first slide}
    %Content goes here
  \end{slide}
  \begin{slide}{This is the second slide}
    %More content goes here
  \end{slide}
% etc
\end{document}
简单的演示文稿
Beamer 类非常强大,提供了许多功能。对于一个非常简单的演示,可以使用基于 article 类的类:
\documentclass[paper=160mm:90mm,fontsize=10pt,DIV=16]{scrartcl}
\usepackage{lmodern}
\pagestyle{empty}
\renewcommand{\familydefault}{\sfdefault}
\newenvironment{slide}[1]{\clearpage
	{\LARGE\bfseries#1\par}\vspace{\baselineskip}
}{}
\usepackage{enumitem}
\setlist{noitemsep}
\title{XeTaL}
\author{Carl Capybara}
\begin{document}
\maketitle
\begin{slide}{slide title}
	This is just some text
	\begin{itemize}
		\item Wombat
		\item Capybara
		\item Mara
	\end{itemize}
\end{slide}
\begin{slide}{Wombat  title}
	This is just some different text
\end{slide}
\end{document}
Beamer 基础主题/示例
以下是一些不错的演示主题示例:
参考文献
-
Andrew Mertz 和 William Slough, 《Beamer by Example》
-
在
hyperref手册中定义的其他可能值 -
附录幻灯片中的 Beamer:控制帧编号